
![]() Press this icon and enter a search string which shows you only the reports that exactly match the search
Press this icon and enter a search string which shows you only the reports that exactly match the search
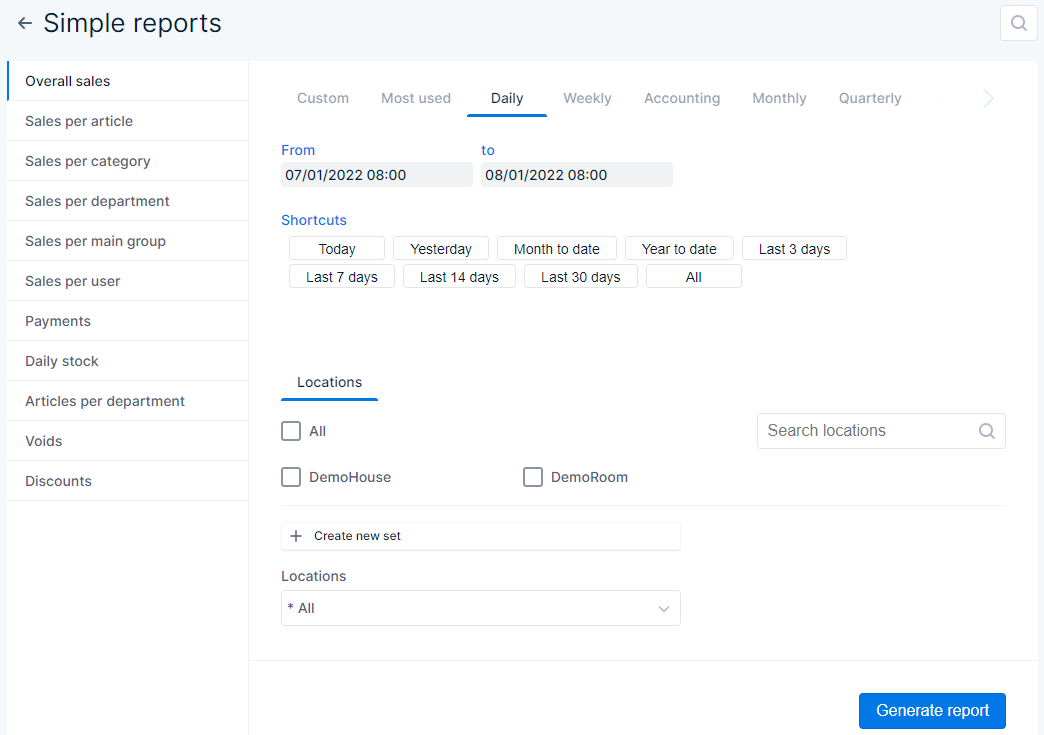
- In the left column❶you can choose predefined reports
- For example:
- Sales per article shows how much of each article was sold
- Sales per user shows how much each user sold
- Discounts shows which discounts were given and by who
- The selected report can be recognised by a coloured indicator mark and the text is bold
![]() This indicates that ‘Overall sales‘ is selected
This indicates that ‘Overall sales‘ is selected
- On the right side you can define the specific parameters that are used to generate the selected report
- The screen is divided in different tabs❷to quickly allow you to choose between the various time ranges
- Per report the parameters you can set may vary, when you select a report the available parameters show automatically❸
![]() Press this button to create the report according to the parameters you set
Press this button to create the report according to the parameters you set
1
2
3
1
Subjects of report
2
Period parameters
3
Parameters used to generate report
Time range
When you have chosen the report, you can define the time range that is used to generate the report. Only data that is within the time range is used on the report. Some reports don’t take time range into account, if that’s so the time ranges will not be available
Custom
- You need to define a start date&time in the ‘From’ section and an end date&time in the ‘To’ section
- The way in which the date & time are set, is the same in both sections
- The highlighted day on the calendar is the day that is selected for the section
- You can press another date to select it
- You can also click the month and year at the top of the calendar to be able to change the month and/or year
- Press once to choose one of the other months in the same year
- Press again to be able to choose another year and then select the month
- Below the calendar in each section you can set the time
- You can use the up ∧ and down ∨ arrows to change the time
- You can also select the field and enter the time on the keyboard
- The left field is for the hours and the right for the minutes
- When you press ‘Today‘, the current date&time are set
- Note that the ‘From’ date&time can’t be after the ‘To’ date&time
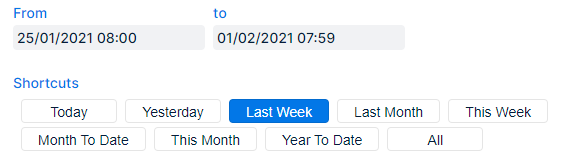
Most used, Daily, Weekly, Monthly, Quarterly, Yearly, and Hourly
On these tabs you can set a time range according to their description
- You can see which time range is currently set
- ‘From‘ shows the start date&time
- ‘to‘ shows the end date&time
- Per tab different ‘Shortcuts‘ can be pressed, these will change the set time range according to their description
- The shortcuts vary per tab:
- Most used: shortcuts with time ranges that are frequently used to generate reports
- Daily: shortcuts per day, Weekly: per week, Monthly: per month, etc
- The shortcuts vary per tab:
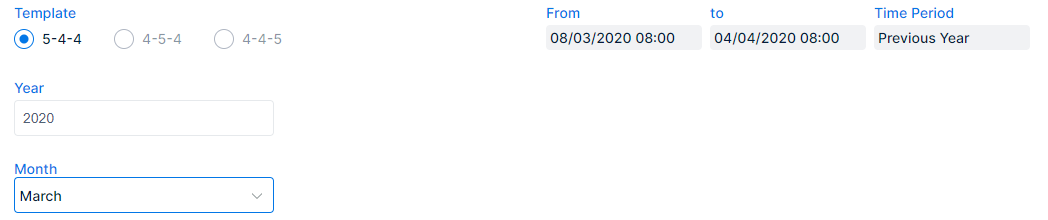
Accounting
Here you can easily select a month of a year according to accounting preferences
- Enable the radio button for the accounting ‘Template‘ that is used to divide a quarter in weeks
- 5-4-4: one quarter = 5 weeks, 4 weeks, 4 weeks
- 4-5-4: one quarter = 4 weeks, 5 weeks, 4 weeks
- 4-4-5: one quarter = 4 weeks, 4 weeks, 5 weeks
- Note that the time range may vary according to the selected radio button
- You can alter the ‘Year‘ by clicking the field and
- Delete/select the current year and enter the year of your choice via the keyboard
- Or use ▲ to go forward 1 year at a time and ▼ to go back 1 year at a time
- You can also select the ‘Month‘ from the drop down menu
- In the ‘From‘ and ‘to‘ fields you can see the period that is going to be used to generate the report
- If you selected a time period in another section this is automatically set here in the field ‘Time Period‘
- To change this go to ‘Custom, Most used, Daily’, etc and set a different time range
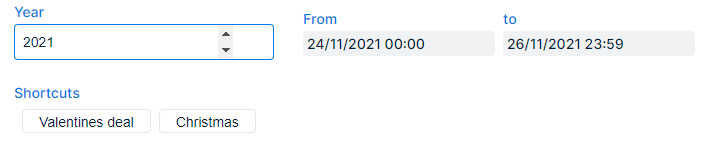
Named periods
Here you can easily select a period that was created with a time range linked to it, e.g. ‘Christmas’
- You can alter the ‘Year‘
- Click the field and delete/select the current entry and alter it via the keyboard
- Or use ▲ to go forward 1 year at a time, or ▼ to go backward 1 year at a time
- Select the ‘Shortcut‘ that represents the named period
- In the ‘From‘ and ‘to‘ fields you can see the period that is defined for the period
Parameters
![]()
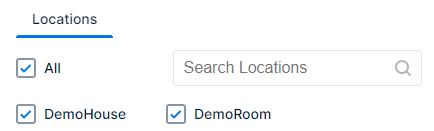
An overview of all locations is shown
- Enable the checkbox(es) corresponding with the location(s) to which the report will apply
- All: Enable this checkbox to (de)select all locations at once
- Use the search field to quickly find the location(s) you want
When you frequently use the same selection of locations you can also create a customised set of selected locations
![]()
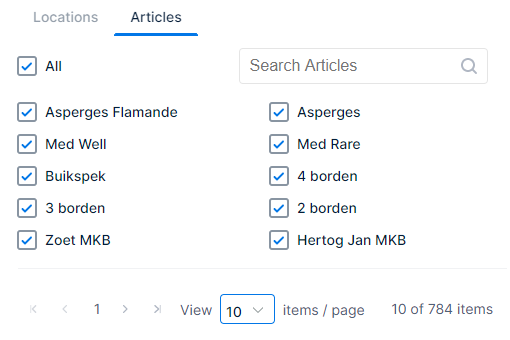
If you click this tab when it’s available, an overview of all articles in the database(s) of the selected location(s) is shown
- Enable the checkbox(es) corresponding with the article(s) to which the report will apply
- All: Enable this checkbox to (de)select all articles at once
- Use the search field to quickly find the location(s) you want
When you frequently use the same selection of articles you can also create a customised set of selected articles
![]()
If you click this tab when it’s available, an overview of all categories in the database(s) of the selected location(s) is shown
- Enable the checkboxes corresponding with the categories to which the report will apply
- All: Enable this checkbox to (de)select all categrories at once
- Use the search field to quickly find the categories you want
When you frequently use the same selection of categories you can also create a customised set of selected categories

![]()
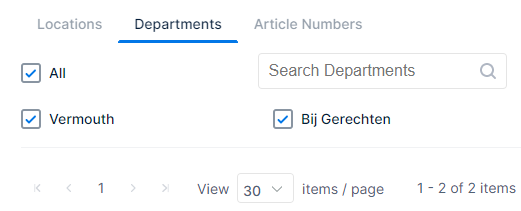
If you click this tab when it’s available, an overview of all departments in the database(s) of the selected location(s) is shown
- Enable the checkbox(es) corresponding with the department(s) to which the report will apply
- All: Enable this checkbox to (de)select all departments at once
- Use the search field to quickly find the department(s) you want
When you frequently use the same selection of departments you can also create a customised set of selected departments
![]()
If you click this tab when it’s available, an overview of all main groups in the database(s) of the selected location(s) is shown
- Enable the checkbox(es) corresponding with the main group(s) to which the report will apply
- All: Enable this checkbox to (de)select all main groups at once
- Use the search field to quickly find the main group(s) you want
When you frequently use the same selection of main groups you can also create a customised set of selected main groups

![]()
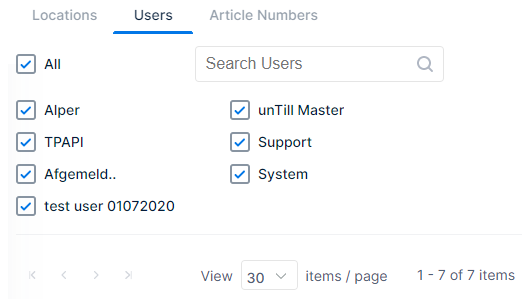
If you click this tab when it’s available, an overview of all users in the database(s) of the selected location(s) is shown
- Enable the checkbox(es) corresponding with the user(s) to which the report will apply
- All: Enable this checkbox to (de)select all users at once
- Use the search field to quickly find the user(s) you want
Pagination
Because some parameters such as Articles, Departments, Users, etc may contain too many options to fit the page, they can be divided over multiple pages. You can use the pagination to go through all pages
-
- When you are in any of these sections you are able to navigate with the buttons that are below the selection checkboxes❶
- |< this will take you directly to the first page
- < this will take you one page back
- 1 this will take you to page one (2 to page two, 3 to page three, etc)
- … this will show you the next three page numbers (if any)
- > this will take you to next page
- >| this will take you directly to the last page
- You can choose how many items are displayed per page by selecting it from the drop down menu❷
- Which items are currently displayed out of the total number of items is also shown
- In the example picture: you are watching the first 30 items from the total of 164 items❸
1
2
3

1
Page navigation
2
Number of checkboxes displayed per page
3
Which checkboxes are displayed of the total
Customisation
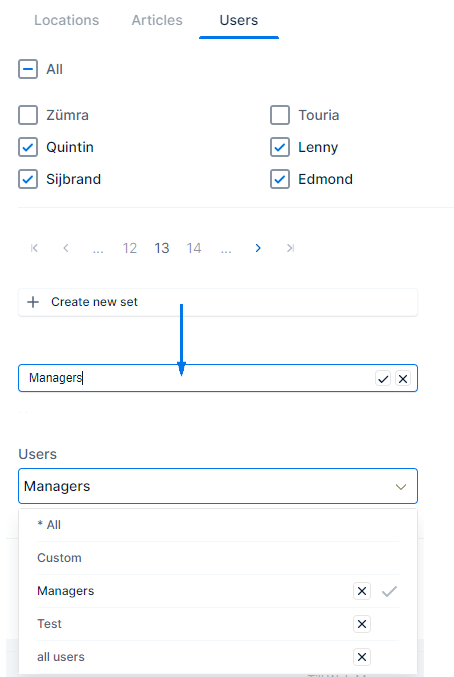
It may be helpful to have a customised selection that can be chosen. With the custom ‘Set’ you can create these for Locations, Articles, Categories, Departments, Main groups, and Users
- Select the items you want to add to the customised set
- For example ‘Users’:
- ‘Quintin’, ‘Sijbrand’, ‘Lenny’, and ‘Edmond’ ❶
- Select the field ‘✛ Create new set’❷
- A cursor and the text ‘Enter Name’ appears in the field
- Enter a name, so you can easily identify it the next time you want to use it<❸
- For example: Managers (if the selected users are managers)
- Use ✓ to confirm the customised selection set
- Use ✕ to cancel
- Next time the basic reports are loaded the customised selection set is available❹
- When you then select ‘Managers’ only the users ‘Quintin’, ‘Sijbrand’, ‘Lenny’, and ‘Edmond’ are used as reference
- The ✕ will remove the customised set. Next time it can’t be selected
This example was with users but it works the same for locations, articles, categories, departments, and main groups
1
2
3
4
1
Select items to add to the customised set
2
Field to create a new customised set
3
Enter a name for the new customised set
4
Customised sets you can choose
Generated report
Once the report is generated you can view, download, and/or print it
- Directly below the WM main and submenu, you see which report you generated followed with the date and time range you set
![]()
- Press
 to return to the home page of the simple reports section
- Press
 to change the date and/or time range, without returning to the simple reports home page
- Press
 to refresh the page and renew the data
- Press
 to open the Windows® print window and set your preferences
- Press
 to zoom out the report so more data fits the window, legibility will be poorer
- Press
 to zoom in so fewer data fits the screen but it is larger and therefore improves legibility
- Press
 to automatically adjust viewing size to fit the screen
- Press
 to download the simple report in a format of your choosing
- Acrobat (PDF) file
- CSV (comma delimited)
- Excel
- Rich Text Format
- TIFF file
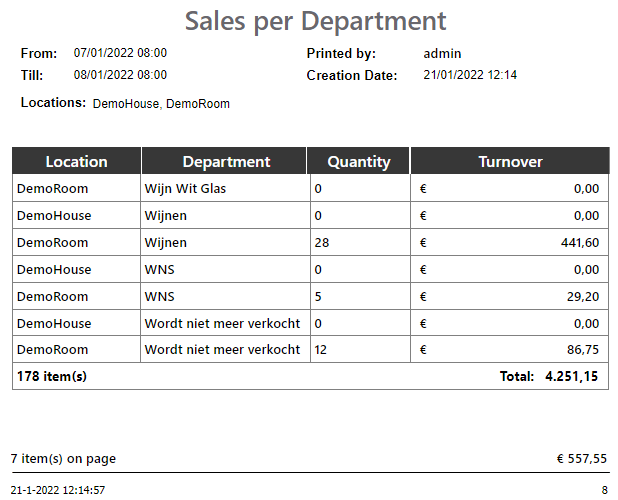
- With the Print Preview slider you can choose how you want to view the generated report
- Means that print preview is enabled❷(this is the default setting)
- The data is displayed as it will be printed on A4 paper
- The number of pages varies according to the amount of data that needs to be fitted per page
- On the bottom of each page the number of items on the page is shown and the sub-total for that page
- On the last page the totals for all data are displayed in bold (the bottom of the last page also shows the sub-totals for that page)
- Means that print preview is disabled
- The data is displayed as one continues overview, which you can scroll through❶
1
2
2
Print preview enabled
1

1
Print preview disabled