New playlist
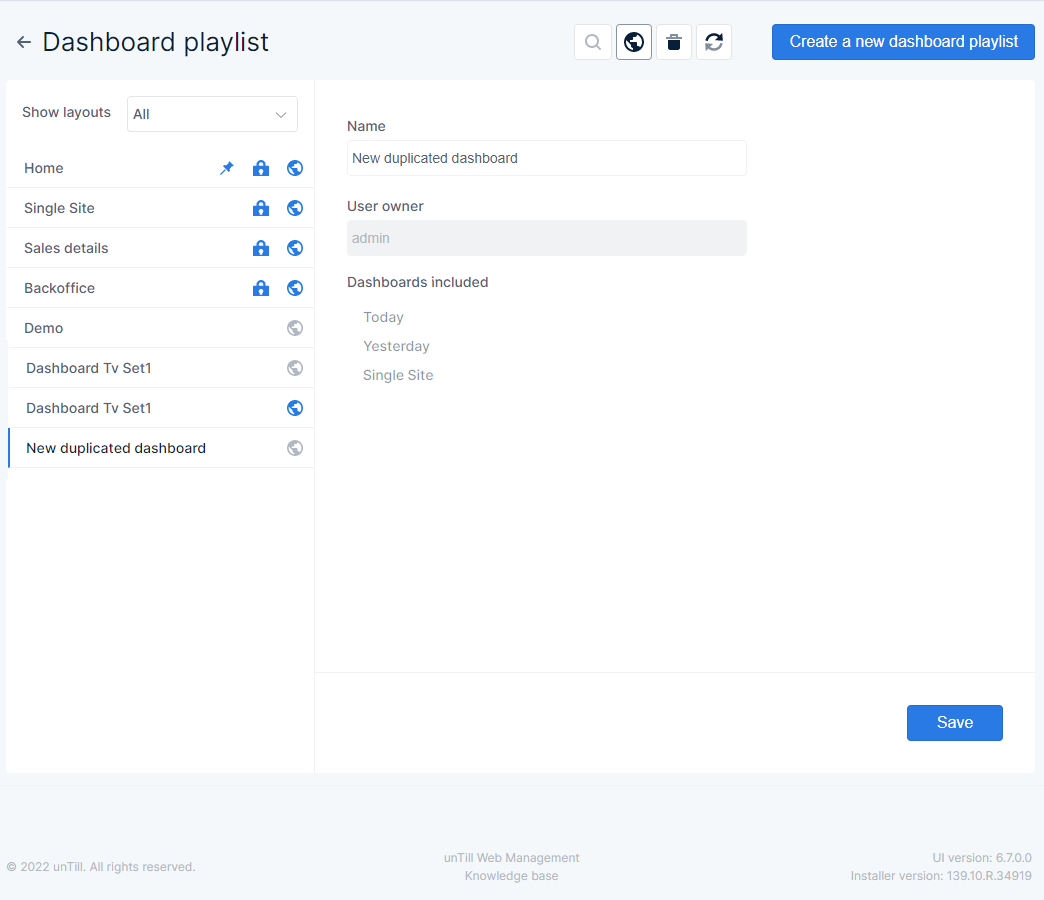
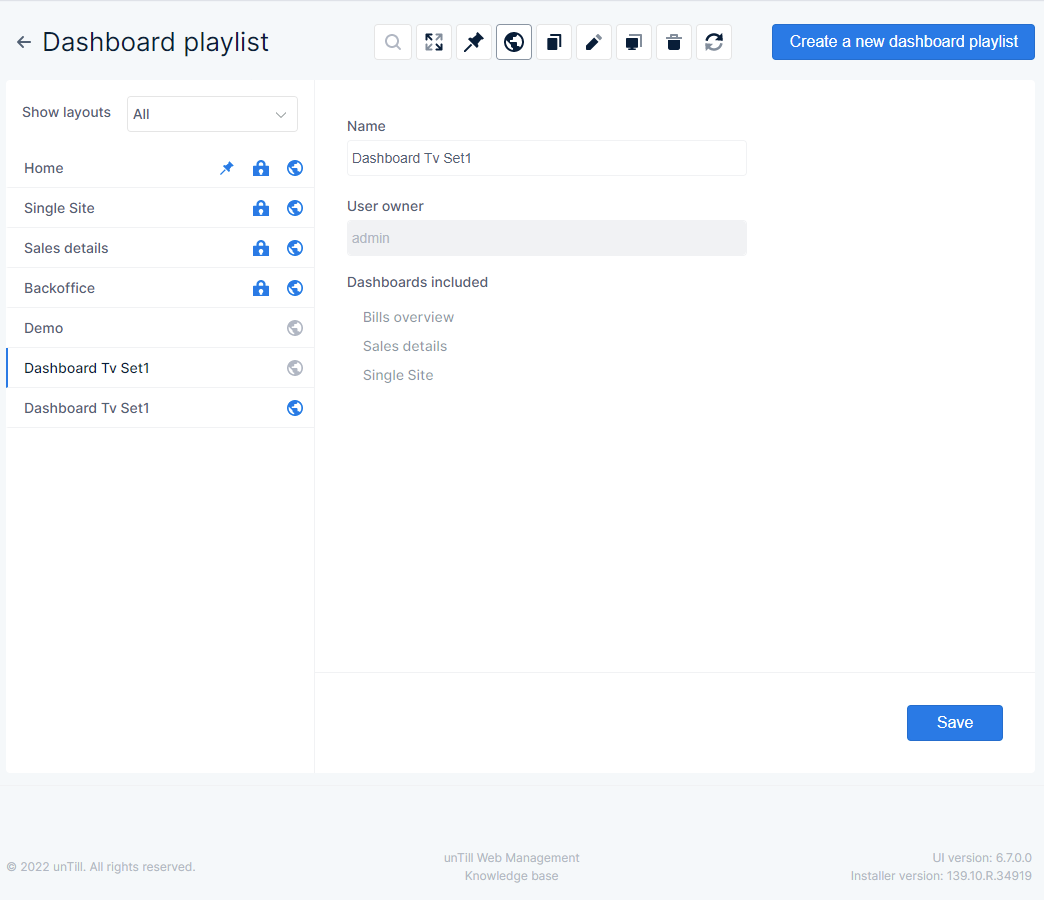
- You can either create a new blank playlist or duplicate an existing one, for both ways an playlist with a default title is added to the bottom of the overview list❶
- Make sure the newly created playlist is selected
- Adjust the name, if needed❷
- Indicate whether the playlist is publicly available or not❸
- When you duplicated a playlist you cannot change which dashboards are included in this step, but you can later on
- Press
 to save the playlist and be able to edit its content
1
2
3

1
New playlist
2
Change name if needed
3
Available buttons
Edit playlist
Whether you want to adjust existing playlists or configure a newly created one, you need to edit the playlist to indicate which dashboards will be displayed on the Web Management homepage
- Select the playlist you want to edit and press

- A pop up window shows
- Use
 to go the following stage in the configuration
 - Use
 to go back one step
 - Use
 to close the configuration without saving it
 - Use
 to save the playlist as it is now and close the configuration pop up
- Use
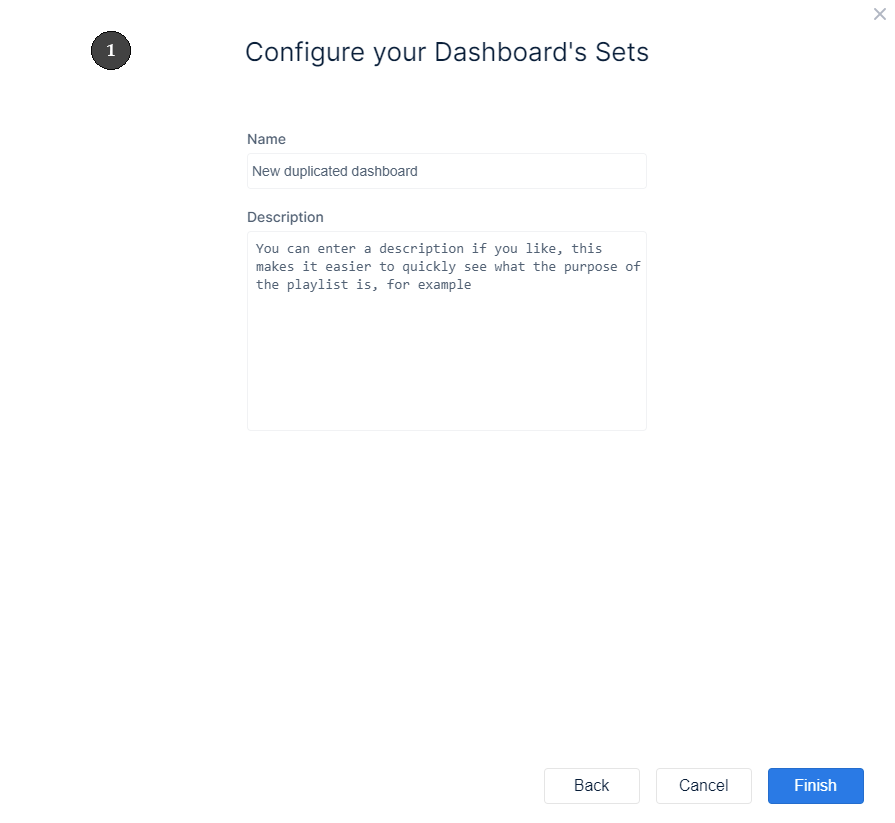
- On the first page❶
- Name → change/enter a name in the field to easily identify the playlist
- Description → you can also enter a description so you can easily use this for future reference
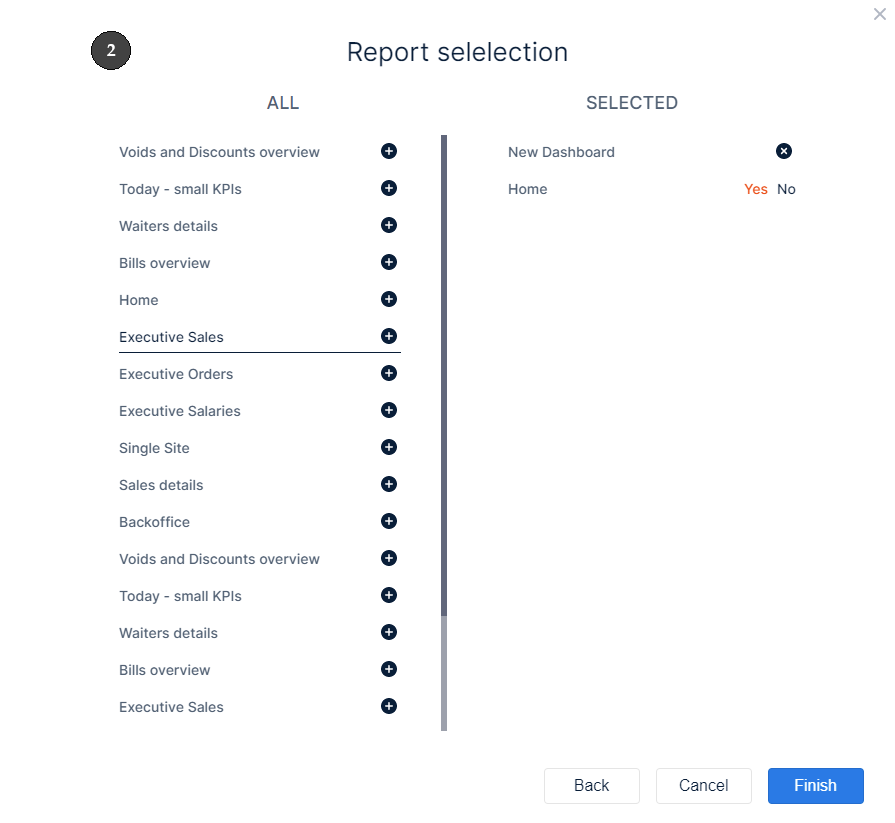
- The report section❷
- In the left column an overview of all dashboards from which you can choose, click a line corresponding with the dashboard you want to add
- In the right column an overview of the dashboards that you have selected is shown
- To remove a dashboard from the playlist press

- The symbol
 changes to text. Press Yes to remove the dashboard from the playlist, or No if you don’t want to remove it
- To remove a dashboard from the playlist press
- Additional criteria
- On the left you see the dashboards for which you can set additional criteria, select one for which the additions will apply
- On the right the criteria are divided into subcategories
- In the General section❸you can change the name that is shown for the selected dashboard in this playlist. You can also adjust the time the selected dashboard is displayed when there are more dashboards in the playlist
- In the Time range section❹you can set a different time range that will be used for the dashboard when shown in this playlist
- Override time range → enable the slider to set a different time range
- Show time range in dashboard header → enable the slider when you want the dashboard header show which time range is used
- In the Locations section❺you can set different locations from which the dashboard will show data when it is used in this playlist
- Override time range → enable the slider to indicate that a different set of locations is used
- When the slider is enabled the fieldLocation
- Show time range in dashboard header → enable the slider when you want the dashboard header to show to which locations the data applies
- Override time range → enable the slider to indicate that a different set of locations is used


