Link a Client to a Table/Table Part
Assign or re-assign an existing client to a table/table part. For clients, different prices and/or discounts may be used for the articles. Depending on the settings in Back Office, the prices may vary when a client is assigned. Prices can even vary per client
- Press the table you want to link to a client
 in case of a Split table: select the table part
 - Press
 to assign an existing client to the table
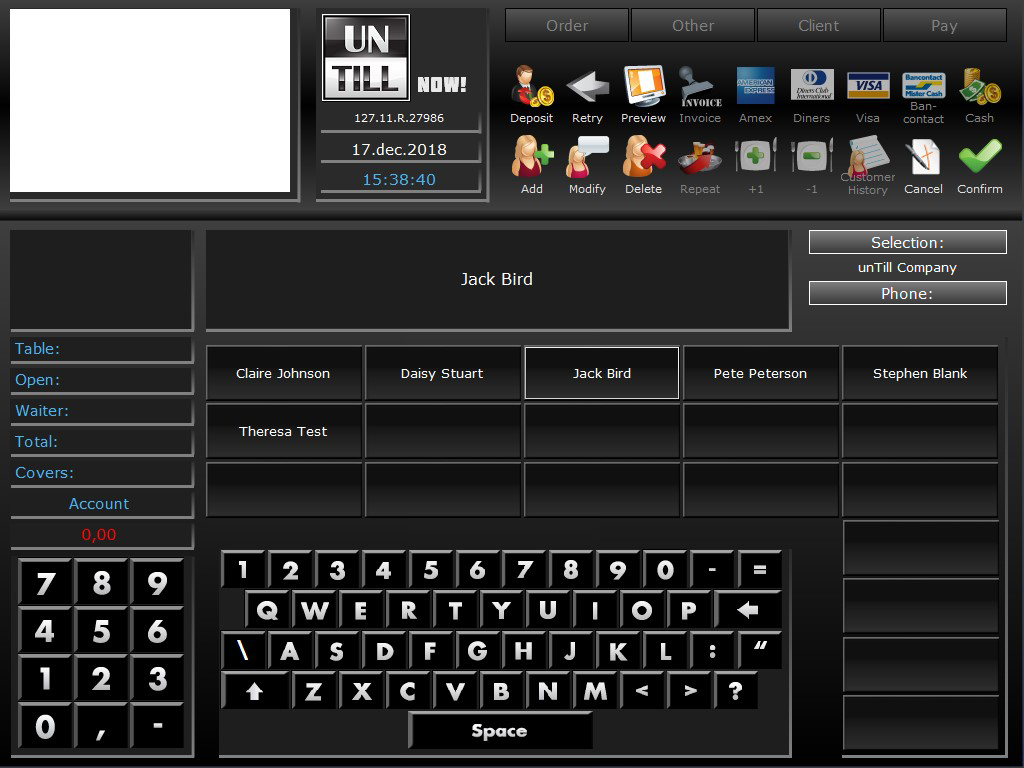
 - The Client Screen opens
- Use a search filter to quicken your search
- Select the client➀The info box➁shows who you selected. Check if this is the correct client and press

- You return to the Order Screen where you can Order more items, or press
 to return to the Table Screen without ordering
The client you linked to this table now shows, along with the table number, in the Table Screenand printed bill(s)
Unlink a Client from a Table/Table Part
All article prices and discounts linked to the client are reset to the default setting when the client is removed
- Make sure the info box➁is blank by pressing
 instead of selecting a client
 - Press

The client is now not linked to the table anymore and doesn’t show in the Table Screen and printed bill(s)
Assign a Name to a Table/Table Part
Assign or re-assign a name to a table/table part
- Press the table you want to link to a client
 in case of a Split table: select the table part
 - Press

- Type in the name on the on-screen keyboard➀
- The name you typed shows in the info box➁(correct it if necessary)
- Press
 to finalize
 - You return to the Order Screen where you can Order more items, or press
 to return to the Table Screen without ordering
The name you assigned now shows, along with the table number, in the Table Screenand printed bill(s)
Remove a Name From a Table
- Make sure the info box ➁is blank by using
 on the on-screen keyboard➀to remove the name
 - Press

The name is now removed and doesn’t show anymore in the Table Screen and printed bill(s)
1
2
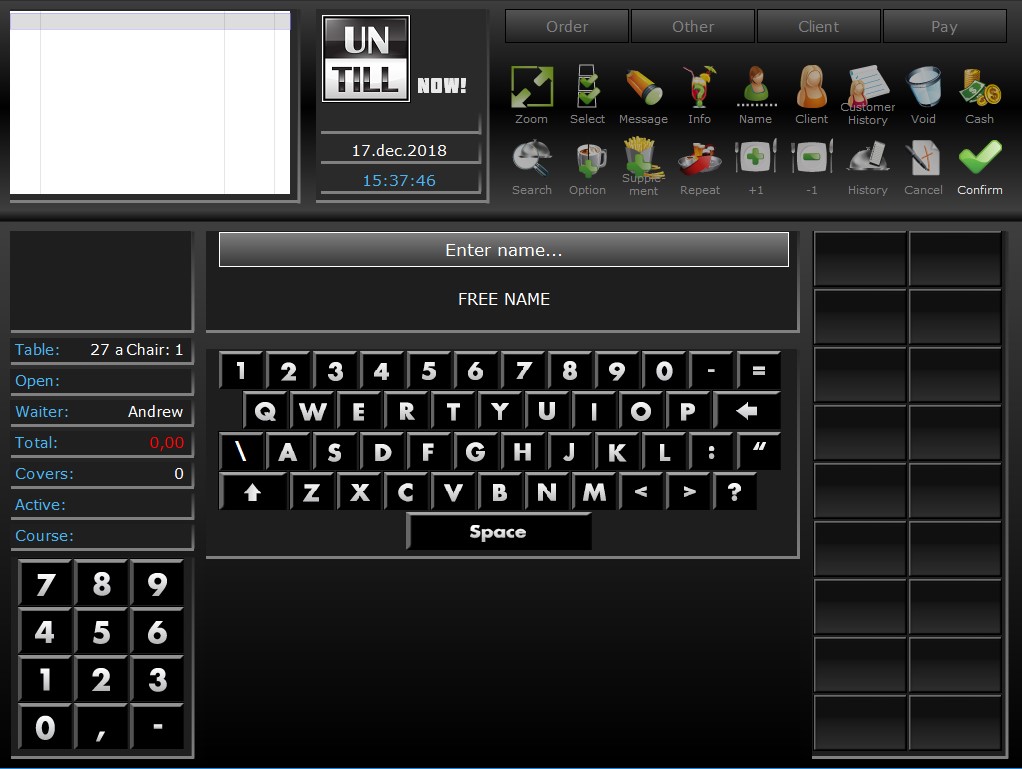
1
On-screen Keyboard
2
Info Box shows the name you entered
Enter a New Client
Enter a new client in the system via the POS
- Open the Client Screen by pressing

- Press

- Enter the new client’s name➀(and optionally their other personal details)➃via the on-screen keyboard/numeric pad➁Make sure the invoice box is checked when the customer is allowed to pay by invoice➂
- Press
 to confirm your entry
 - Press
 or
or to return to the Table Screen
The new client is now in the system and can be selected if necessary
1
2
3
4
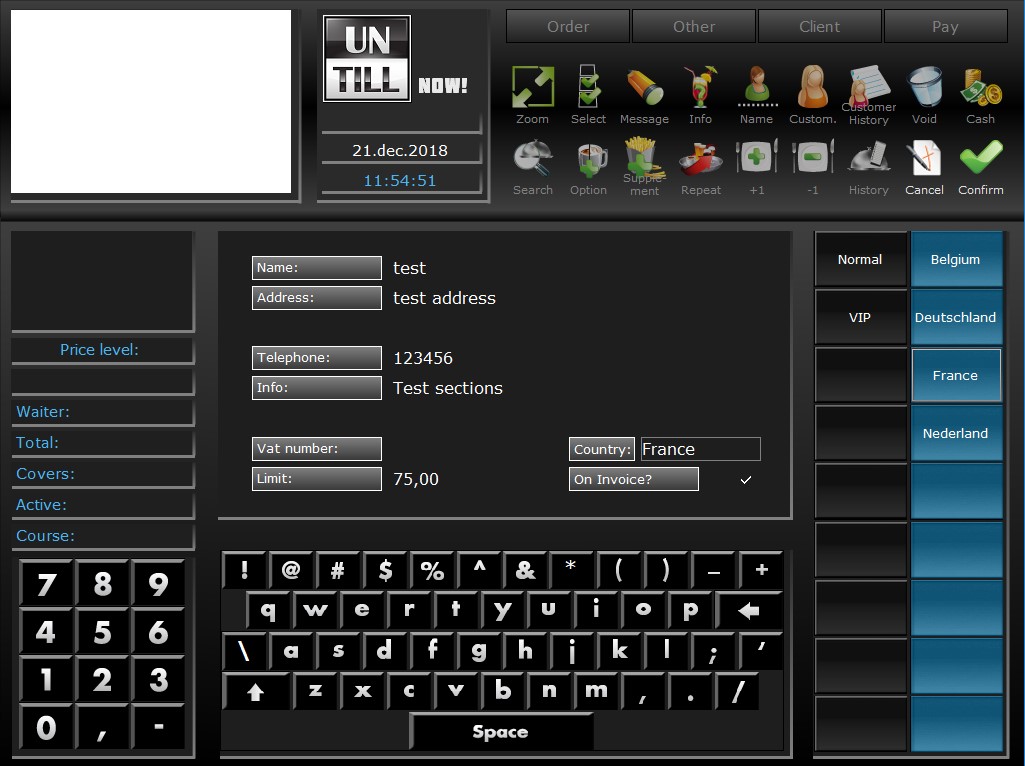
1
Fill in the client’s name
2
Keyboard and Numeric Pad
3
Invoice is activated for this client when the box is checked
4
Optional personal data can be entered
Modify Client’s Personalia
Modify a client’s personal data in the system via the POS
- Open the Client Screen by pressing

- Use a search filter to quicken your search
- Select the client whose data you want to modify
- Press

- Select the data you want to modify by clicking next to to the subject box, e.g. alter the address by pressing next to the box marked “Address:”➀
- Alter the data by using the on-screen keyboard/numeric pad➁
- Press
 to confirm your entry
 - Press
 or
or to return to the Table Screen
The client’s personal data is now altered in the system
1
2

1
Alter the client’s personal details
2
Keyboard and Numeric Pad
Add or edit client card
Link/edit one or more client cards and/or smart cards via the POS
- Open the Client Screen by pressing

- Use a search filter to quicken your search
- Select the client whose data you want to modify
- Press

- Press
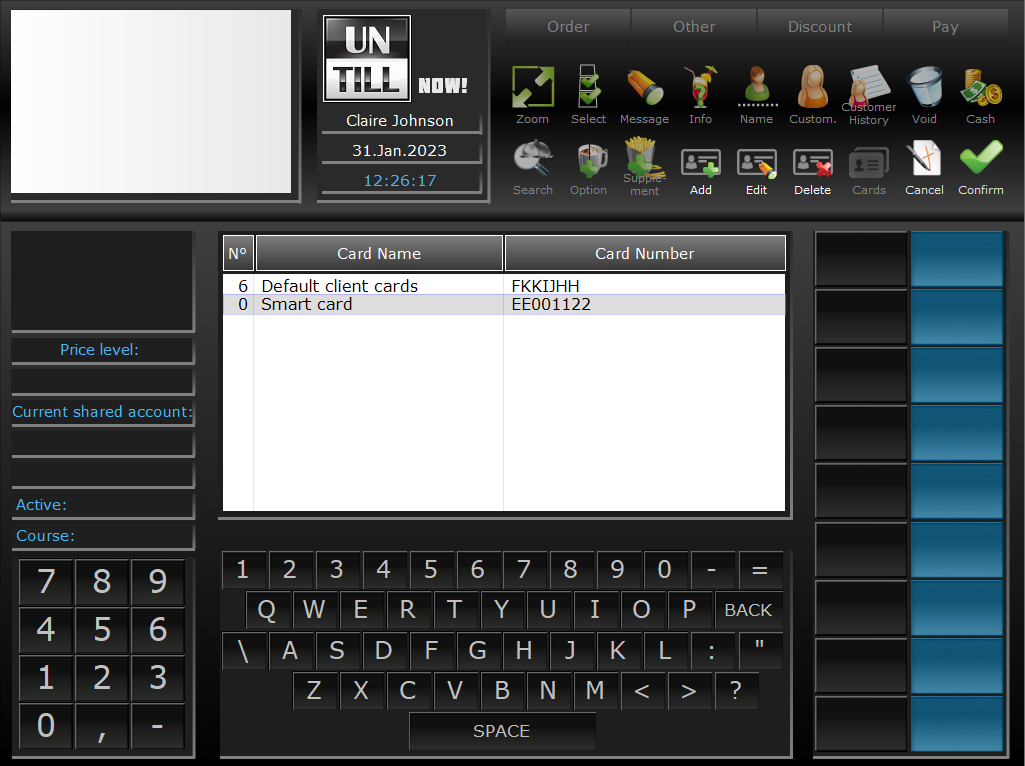
 to open the overview of cards linked to the client➀
Add client card or smart card: you can add client cards and smart cards to the client
- Press

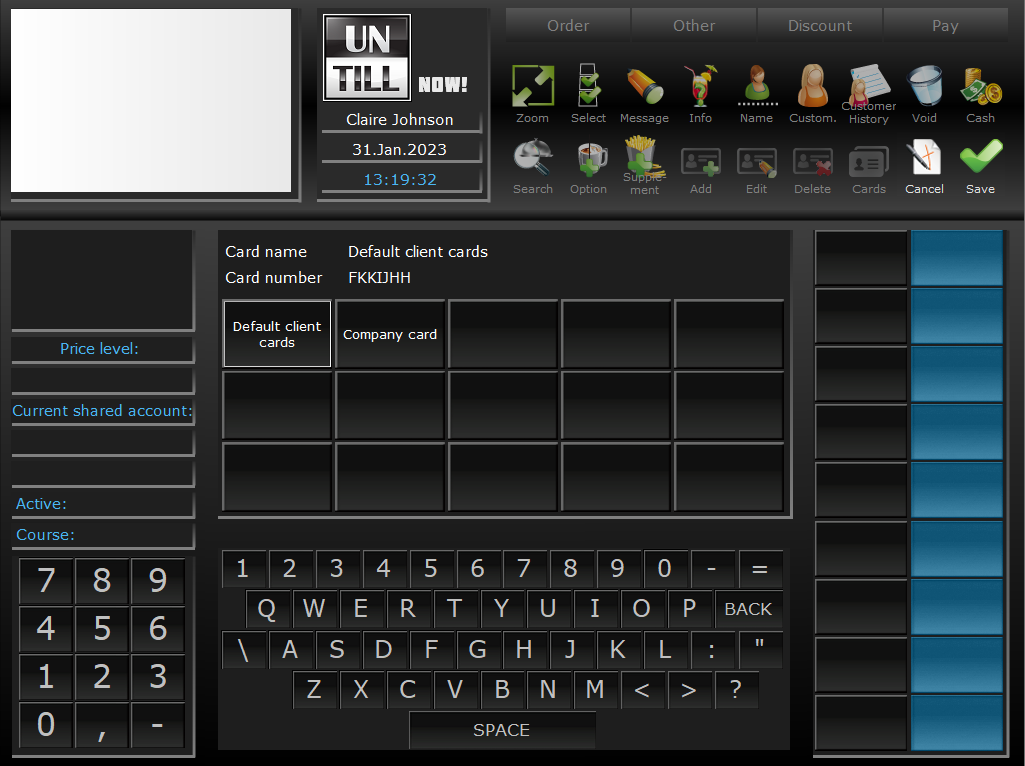
- To add a client card:
- From the buttons➁select the desired client card group to which the card will be assigned
- Scan the card or use the keyboard to link a code to the card
- To add a smart card:
- Scan the card, smart cards can only be added by a scanner if you add it manually it will be added as a ‘normal’ client card
- To add a client card:
Edit client card: you can only edit client cards not the smart cards
- Select the client card you want to edit➀and press

- The card name button is highlighted
- The card’s group name and card number are displayed➂
- You can scan or enter a different code and/or choose another card group name
Delete client card or smart card: you can also delete a client card or smart card to unlink it from the client
- Select the client card or smart card you want to unlink from the client➀and press

- The selected card is instantly removed from the list and unlinked from the client. This can only be undone by adding the card again
- When you are done adding/editing/removing cards from the client, press
 to confirm, or
- You return to the Client edit screen, press
 or
or to return to the Table Screen
1
1
Client card overview
1
2
3
2
Card group name selection buttons
3
Card’s group name and card number
Delete Client
Delete a client data from the system via the POS. Clients that still have open, unpaid orders can only be deleted via the Back Office
- Open the Client Screen by pressing

- Use a search filter to quicken your search
- Select the client you want to delete from the overview➀
- Check the info box➁whether you selected the correct name
- Press
 (you can’t undo this action)
 - The client is removed from the overview➀and from the system
- Press
 or
or to return to the Table Screen
To undo, you have to enter the client as a new client
Deposit an Amount to a Client Account
Allows you to deposit a paid amount to a client’s account which they can use to pay the bill, this only works for clients that aren’t allowed to pay by invoice
- Open the Client Screen by pressing

- Use a search filter to quicken your search
- Select the client to whose account you want to add the amount➀
- Check the info box➁whether you selected the correct name
- The client’s remaining amount is shown in the table information➂
- Press

- Enter the amount you want to add on the numeric pad➃
- Choose one of the payment types
The amount is added to the client’s account and you automatically return to the Table Screen

