
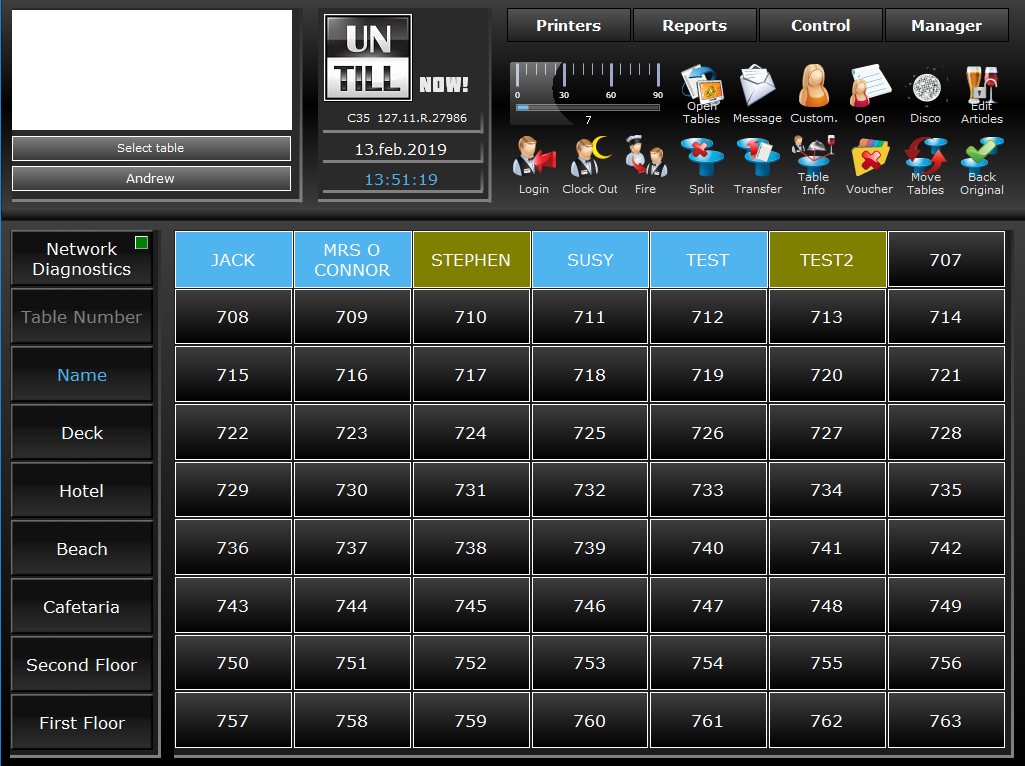
Table Colours
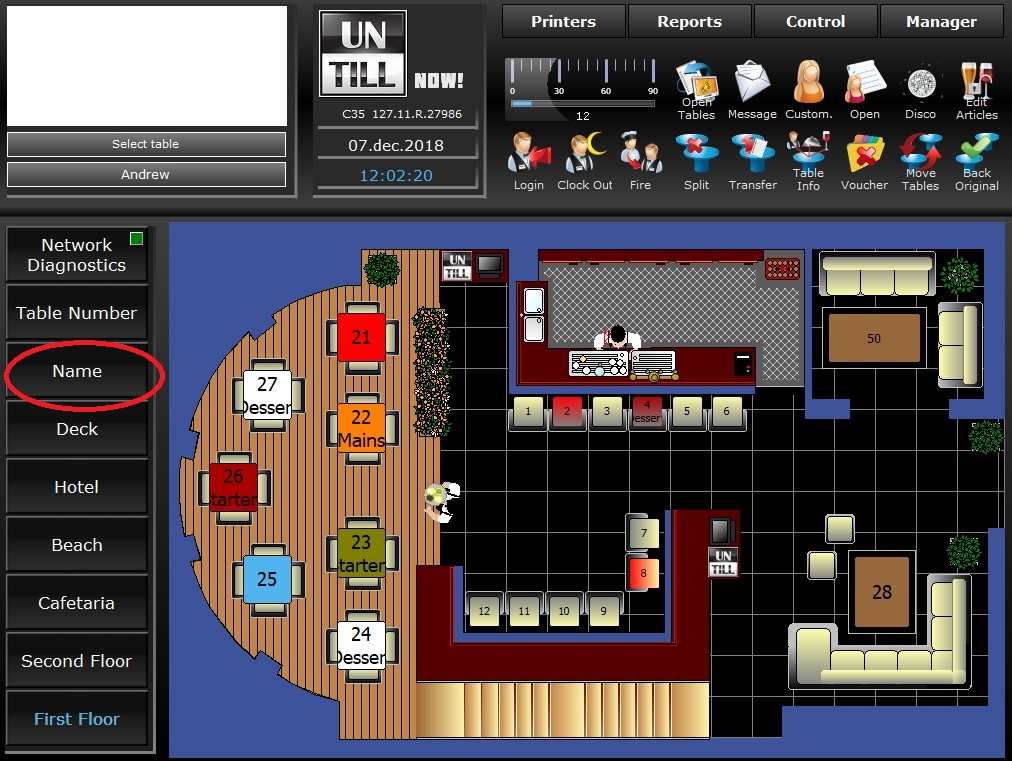
Depending on the status of a table, it is shown in a different colour in the Table Screen➀ Each course has its own predefined colour, but time is also a factor, for instance, when it has been a while since a table placed a new order, the colour changes to red➁(colours can be adjusted, in the Back Office, to suit your preferences)
An empty table is shown in the Table Screen as![]() or
or![]()
The numbers depicted on the tables are their respective table numbers
1
2

1
Different coloured tables
2
Red coloured table
Ordering Items
Per Table/Table Part
Select the items to add to the bill, you can also link a client and/or a name to the table(part)
- Click in the Table Screen on the image of a free table or a seat
 in case of a Split table: select the table part to which you want to assign the name
 - The Order Screen opens
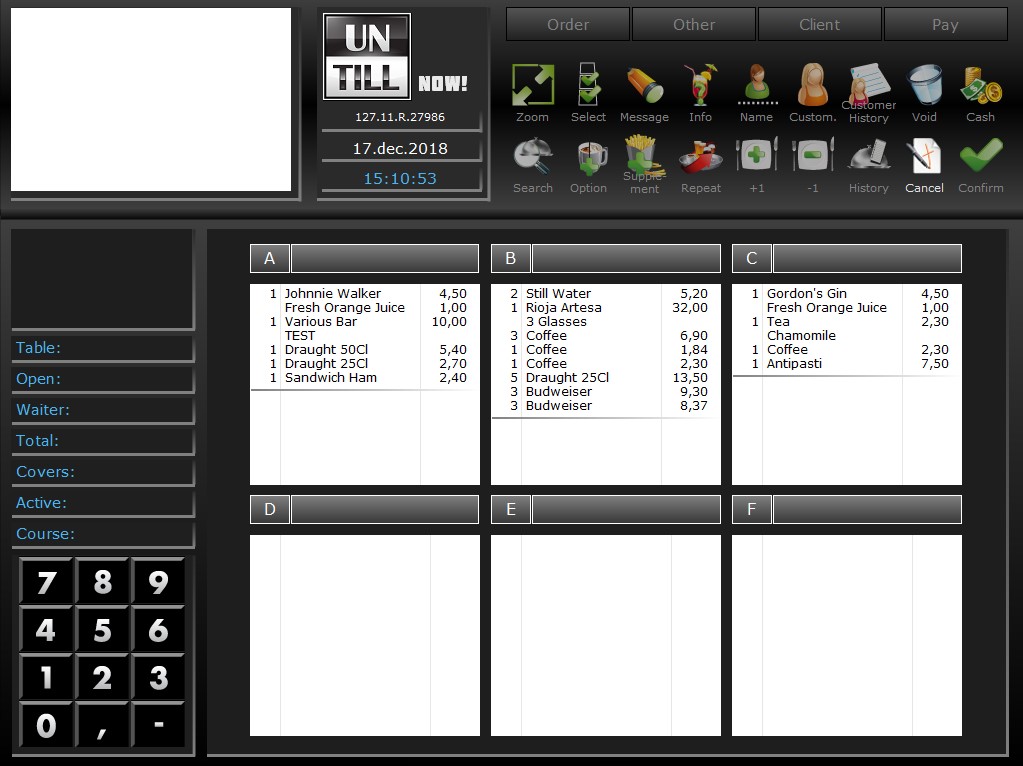
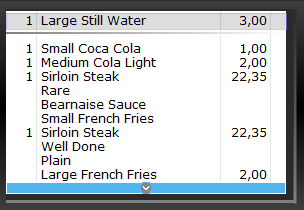
- Select the items you want to add to the order➀
- The selected items appear in the Order Overview➃in the table information➁the total amount is automatically adjusted
- To remove an item, click the item in the Order Overview➃and press

- When the order is complete press

- The order is automatically shown and/or printed by the pre-assigned screen(s)/printer(s)
- You will automatically return to the Table Screen
- To return to the Table Screen without placing an order: Click
 BEFORE you press
You can keep adding orders to the bill by repeating these steps until the bill is closed
By Seat Number
You can specify who orders what by selecting the chair number
- Click in the Table Screen on the image of a free table or a seatin case of a Split table: select the table part to which you want to assign the name
- The Order Screen opens
- The table information➁shows the table number, bill part and which chair number you are ordering for
- Click on the word “Other” in the Order Screen
- Press
 to go to previous chair number
Press to specify a chair number
Press to go to next chair number
 - Check the chair number in the table information➁
- Order articles for this chair
- Switch chair number and repeat
- When all chairs have ordered their articles finalize with
Make sure you have the correct chair selected while ordering items

By Client
Specify a client who orders items without assigning them to a table/table part
- Press
 in the Table Screen
 - The Client Screen opens
- Select one of the existing clients or create a new client
- Press
- The Order Screen opens
- Proceed to take the order, finalizing withto return to the Table Screen
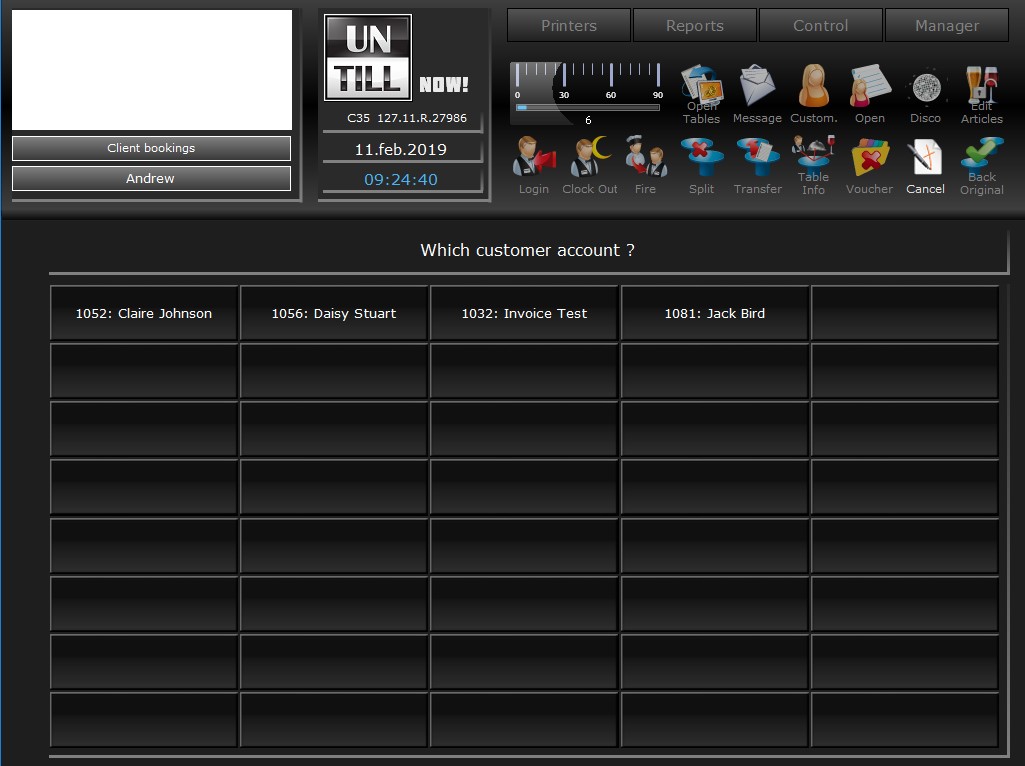
- Press
 in the Table Screen to see an overview of open client orders
Select one to add articles to the order
Or for payment
1
1
Open client bills
See client’s order history
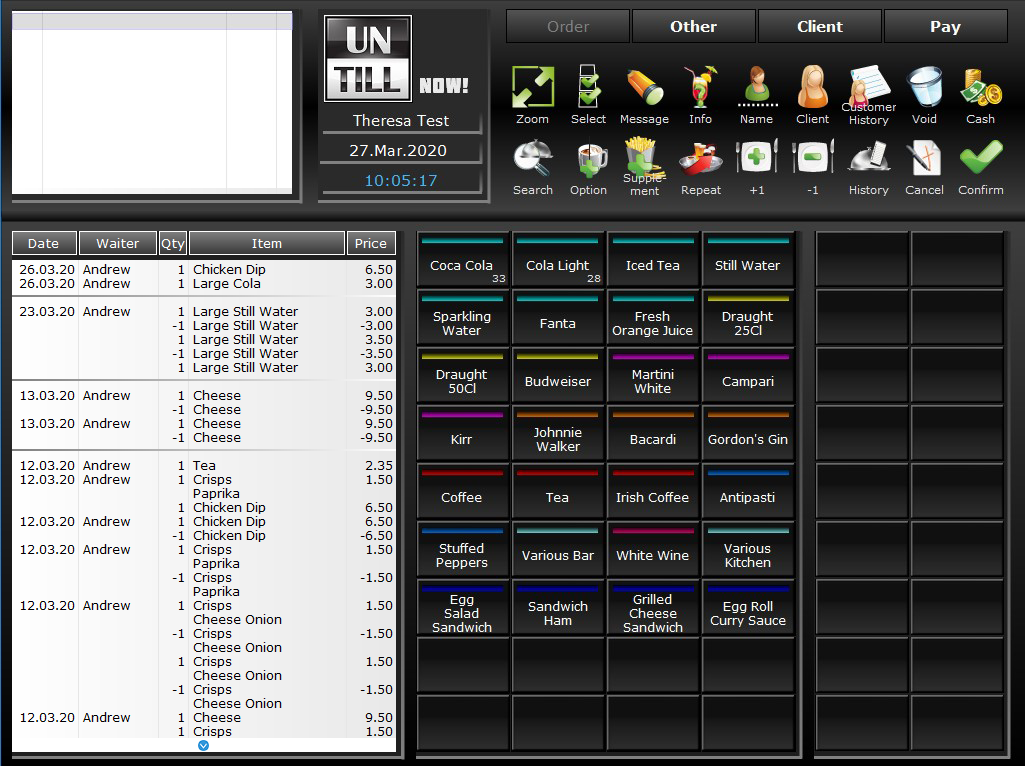
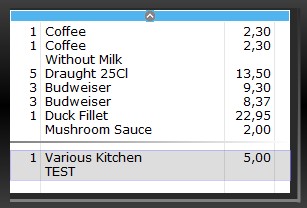
When a client is assigned to an order you can also see the client’s order history in the Order Screen. This might come in handy when the client wants to order something they had before, but can’t remember the name, for example
- While in the Order Screen make sure a client is assigned to the order➀
- Pressto open the list with the client’s complete order history➁
- The client’s orders are displayed according to date, starting with the latest and descending to the first order
- You can scroll through the list by clicking
 to go down the list and
 to move back up in the list
 - To close the order history list, click on the list➁or press
Once the client’s order history is closed you can proceed to select articles to add to the order
1
2
1
Assigned client
2
Client’s order history
By Name
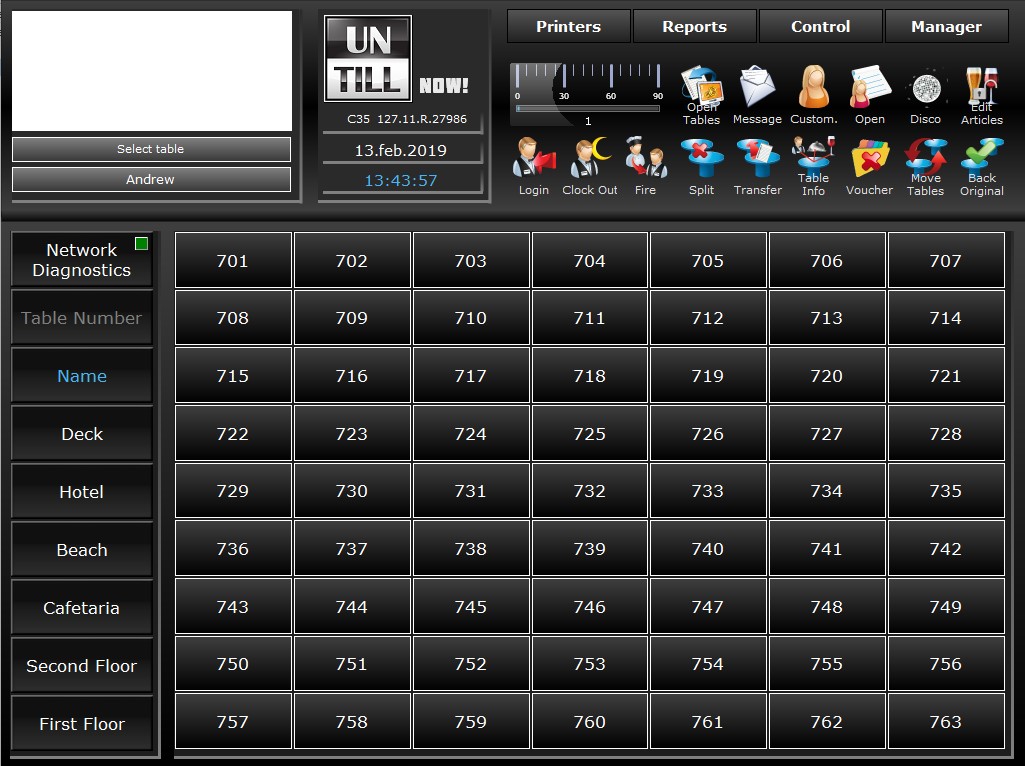
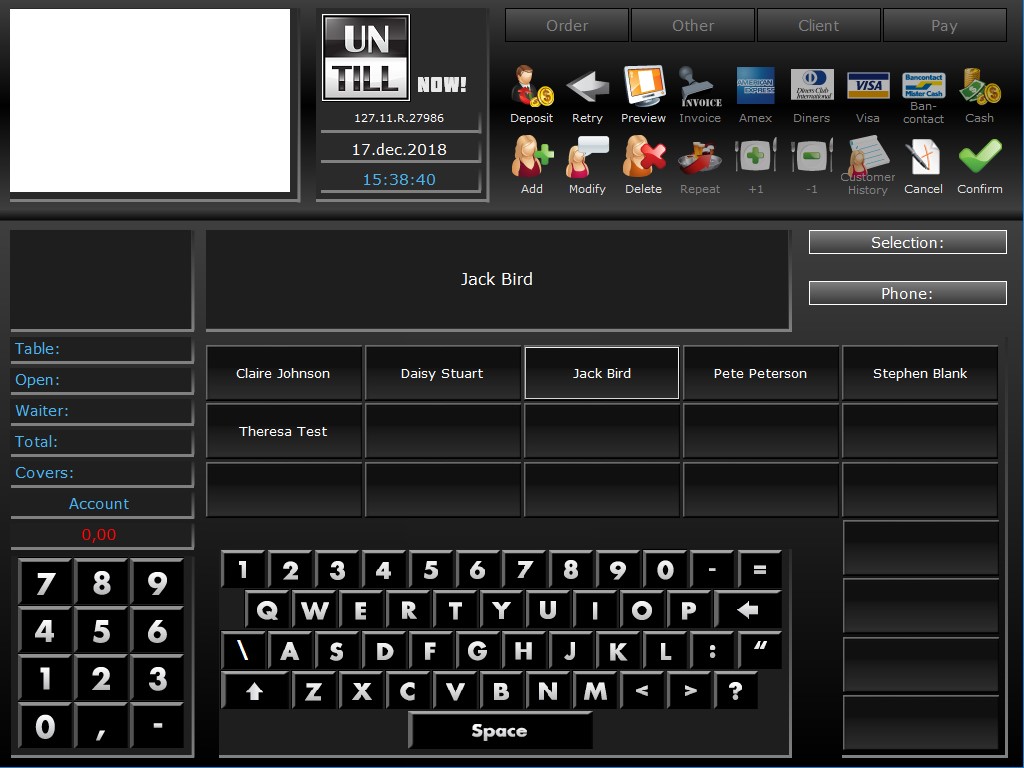
Book orders directly to a name, without specifying a table/table part in the Table Screen
- Click “Name” in the Table Screen
- The Book on Name Screen opens
- Select one of the numbered tiles➀
- Enter the name, using the on-screen keyboard
- Press
- The Order Screen opens
- Proceed to take the order, finalizing withto return to the Table Screen
- Press “Name” in the Table Screen to see an overview of open orders to name
Select one to add articles to the order
Or for payment
1
1
Numbered tiles to select
Select Articles
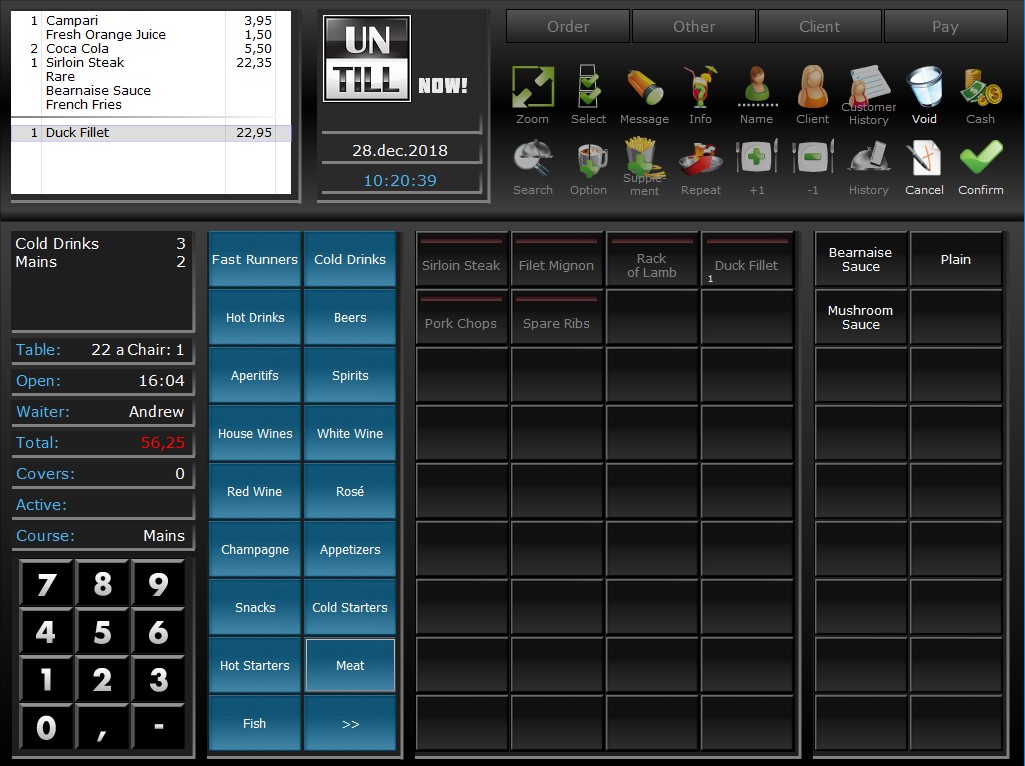
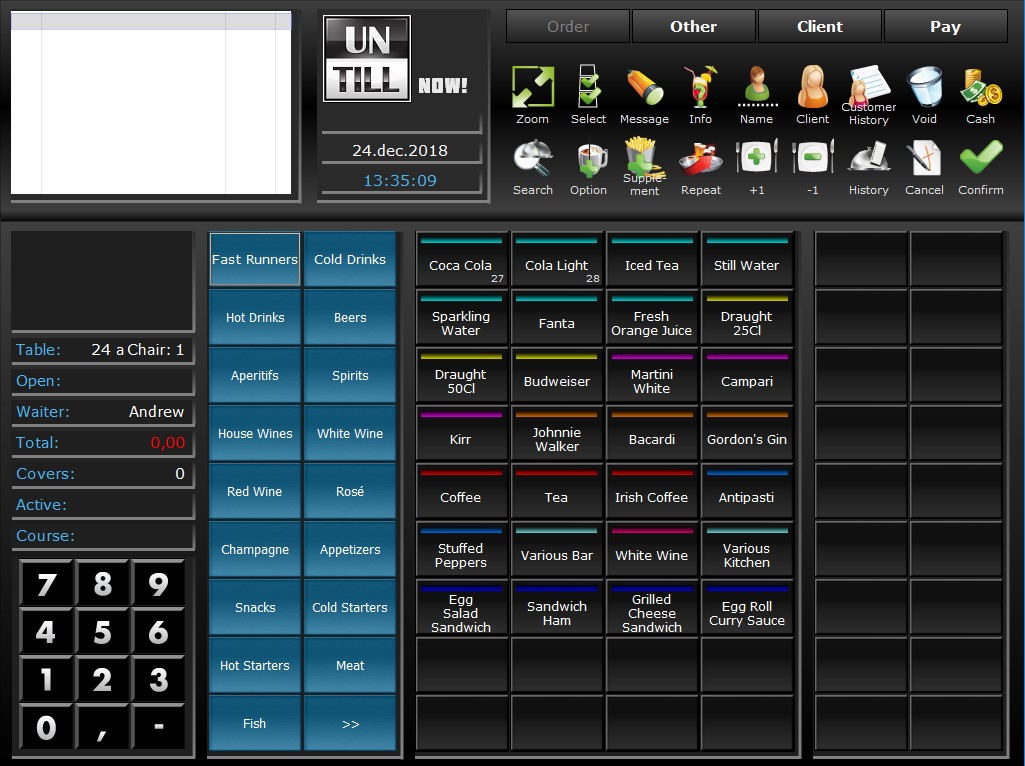
For every order you make you have to select articles in the Order Screen
- First you have to select the department➀from which you want the articles to show
Default shows the articles from the top left department
In the example the department “Meat” is selected so the articles assigned to this department show on screen - Click the tile with the article name you want to add to the order➁
For a plural enter the number on the numeric pad➂before selecting the article tile, or press the same tile the specific number of times - The selected article shows in the overview➃
- Keep adding articles this way till the order is complete and finalize your order with
When you are having trouble finding an article or you do not know which department it belongs to, you can use the search option
- Press
 in the Order Screen
 - Type the article name you are searching on the on-screen keyboard➄
- The system immediately shows the articles➅that resemble your search query
The narrower the search, the more precise the results - Select from this list the article that you want➅to add
In some cases an extra option(s) appears➆automatically when an article is selected. In case the option(s) is(are) a suggestion, you don’t have to select one. However the option(s) can be mandatory, in this case you have to select one (or more) to proceed with the article selection
1
2
3
4
5
6
7
1
Departments to select
2
Article tiles to select, according to the selected department
3
Numeric pad
4
Order overview
7
Suggestion or mandatory addition to the article
1
2
3
4
5
6
5
On-screen keyboard
6
Articles compliant with the search query
Options
Add one ore more preset options to an item (e.g. tea “with milk”)
Free options and Must have options:
- When you select an article, a free, or must have option may be assigned
- For a free option you can optionally select an option➂
- If you don’t choose an option you can simply select another article➁to add to the order
- For must have options, one or more options have to be selected before you can continue adding other articles
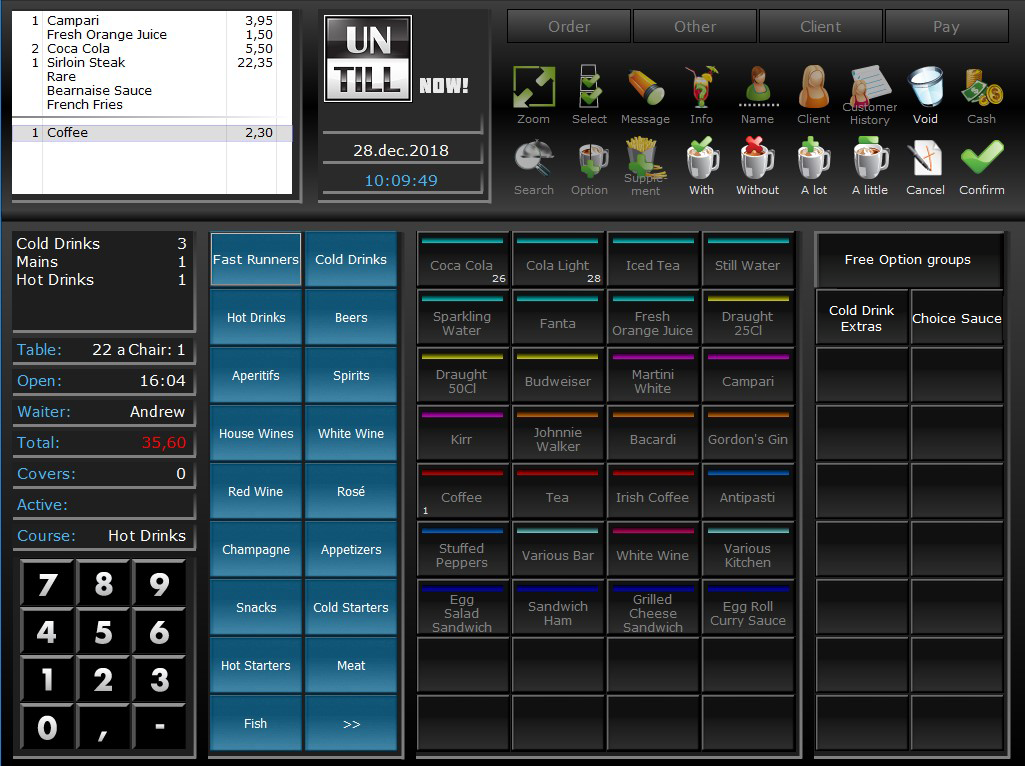
Free option groups:
- When multiple free option groups are assigned to the article, you have to select the option group from which you are going to add options to the article➆
- When you click on the option group name, the available options appear
- Select one, or if allowed more, to add them to the article
- You can simply select another article➁if you don’t want to add anymore options
- Pressto return to the previous screen and you can select another option group
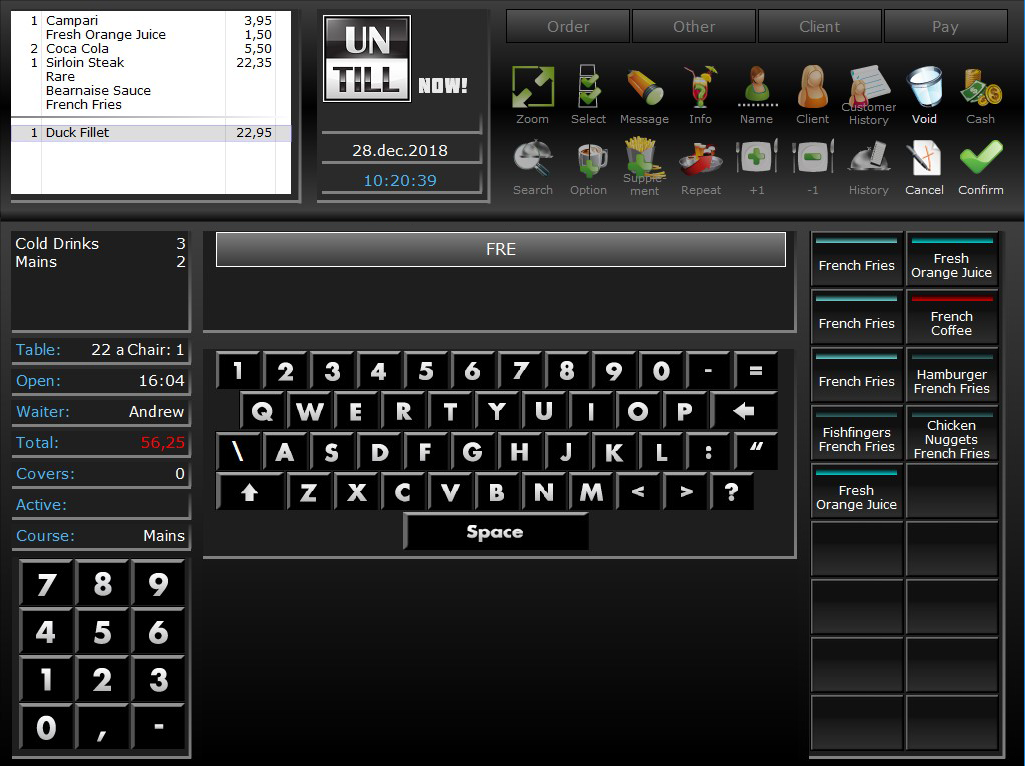
Manually add an option:
- In the Order Screen select the item in the Order Overview➀and click

- Optionally you can select
 or,
or, or,
or, or,
or, ➃to add a predefined text to the option (this will show on the order overview after you have selected the option)
 - Select the option➂you want to add
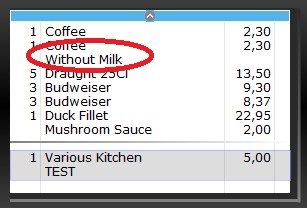
- Your chosen options show on the Order Overview➀
- Pressto finalize
The added option is now attached to the selected item and will also show on the designated screen(s) and/or printer(s). To remove the option: you have to remove the whole item using the![]() button, then re-order the item and repeat the steps to add one or more options
button, then re-order the item and repeat the steps to add one or more options

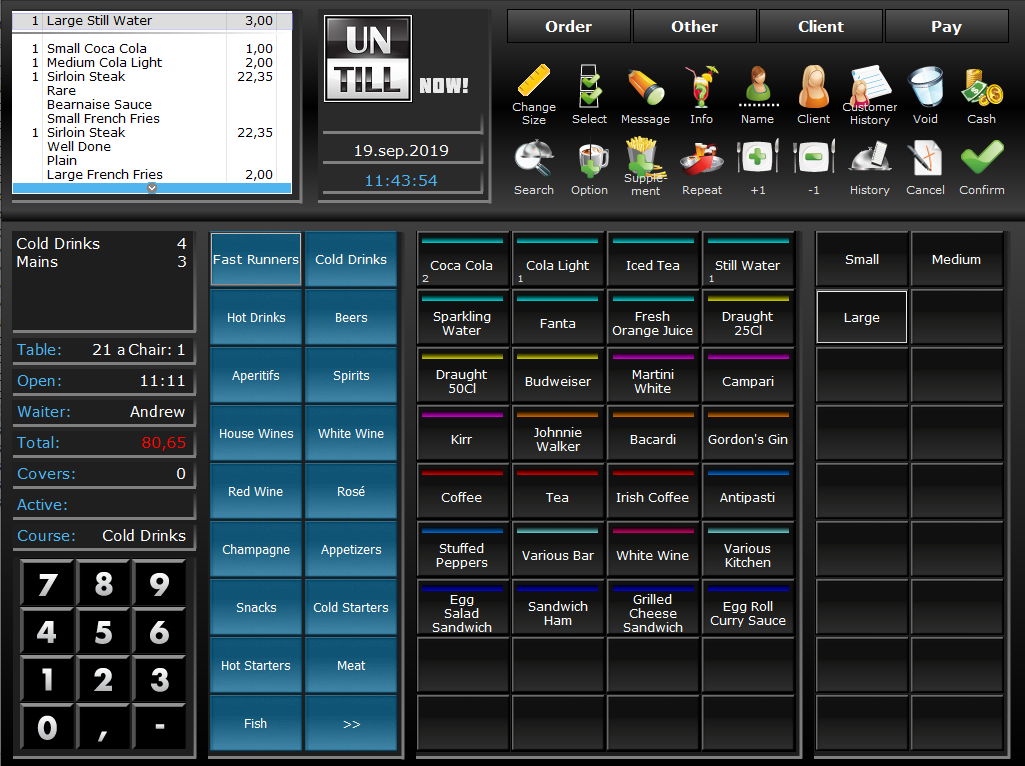
Add Size Modifier
Articles can be sold in varying sizes, the waiter needs to indicate which size is used for the article when the item is ordered (including when the article is an option, condiment, etc.)
- In the Order Screen an article that uses size modifiers is selected
- The size modifiers appear➀
- Select the one that applies for the article
- The name of the size modifier plus the article name is displayed in the order overview➁
- The corresponding price is also used
- To change the size modifier for an article, select the article and size you want to alter and press

- Select another size modifier name➀
The size modifier plus the article name are displayed everywhere the article is usually shown (tickets, kitchen screens, etc.)
1
2
1
Size modifiers to select
2
Order overview with size modifier names and prices
Add a weight article
For some articles a price can be determined according to its weight. Depending on which scale and method you use this can be done in different ways
No linked scale
When no scale is linked to unTill you need to use a separate scale and enter the weight that is displayed on the scale manually
- Select the article that needs a weight
- Use the num-pad to enter the number of grammes that is displayed on the scale➀and press
- The price for the article➁is multiplied by the number of grammes you entered and the article is added to the order list for that (rounded) price➂
Linked scale
When a scale is linked the article’s weight is sent directly to unTill from the scale, so you cannot enter it manually. Depending on the linked scale, you either need to select the article before you place it on the scale, or you need to place the article on the scale and then select it on the POS. Some scales can do both
- First select article
- Select the article in POS
- Place the article on the scale and wait till the weight is displayed in unTill➀
- Press
- The price for the article➁is multiplied by the number of grammes you entered and the article is added to the order list for that (rounded) price➂
- First weigh article
- Place the article on the scale
- Select the article in POS
- Check if the weight in unTill is the same as on the scale➀
- Press
- The price for the article➁is multiplied by the number of grammes you entered and the article is added to the order list for that (rounded) price➂
1
2

1
Article’s weight
2
Price that is used to calculate
1
2
3

3
Price after weight is confirmed
Supplements
Add one ore more preset supplements to an item (e.g. coffee “with apple pie”)
- In the Order Screen select the item in the Order Overview➂and click

- Select the supplement(s)➁you want to add
- Your chosen supplements show on the Order Overview➂including the additional cost (if any)
- Pressto finalize
The added supplement is now attached to the selected item and will also show on the designated screen(s) and/or printer(s)
To remove the supplement: you have to remove the whole item using the![]() button, then re-order the item and repeat the steps to add one or more supplements
button, then re-order the item and repeat the steps to add one or more supplements
Free Text
Add a free text to an item
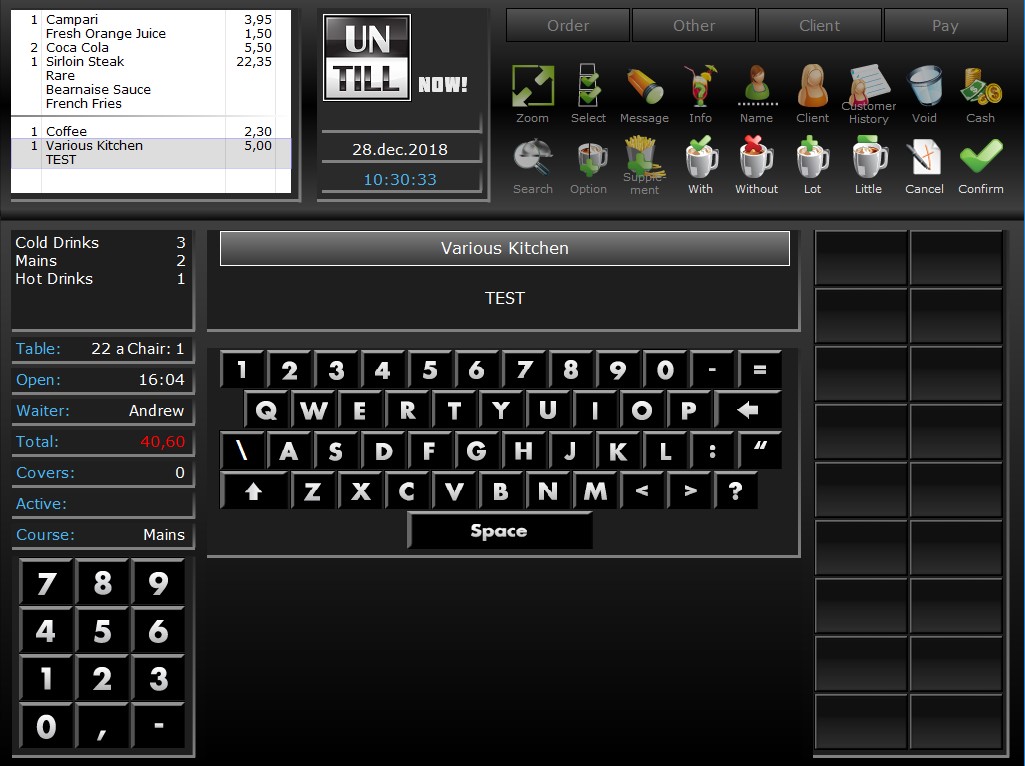
- In the Order Screen select the item in the Order Overview➁and click

- Type the text, you want to attach to the item, on the keyboard➀that automatically pops up on screen
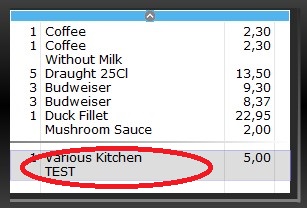
- Your text shows on the Order Overview➁
- Pressto finalize
The text is now attached to the selected item and will also show on the designated screen(s) and/or printer(s)
Allergens
With this feature it’s very easy in Back Office to indicate whether an article contains allergens and which ones they are. The waiter can then quickly see that in POS when an article is ordered. It is however not required to have these indications, the waiter can assign allergens to an article even when in Back Office this info isn’t entered
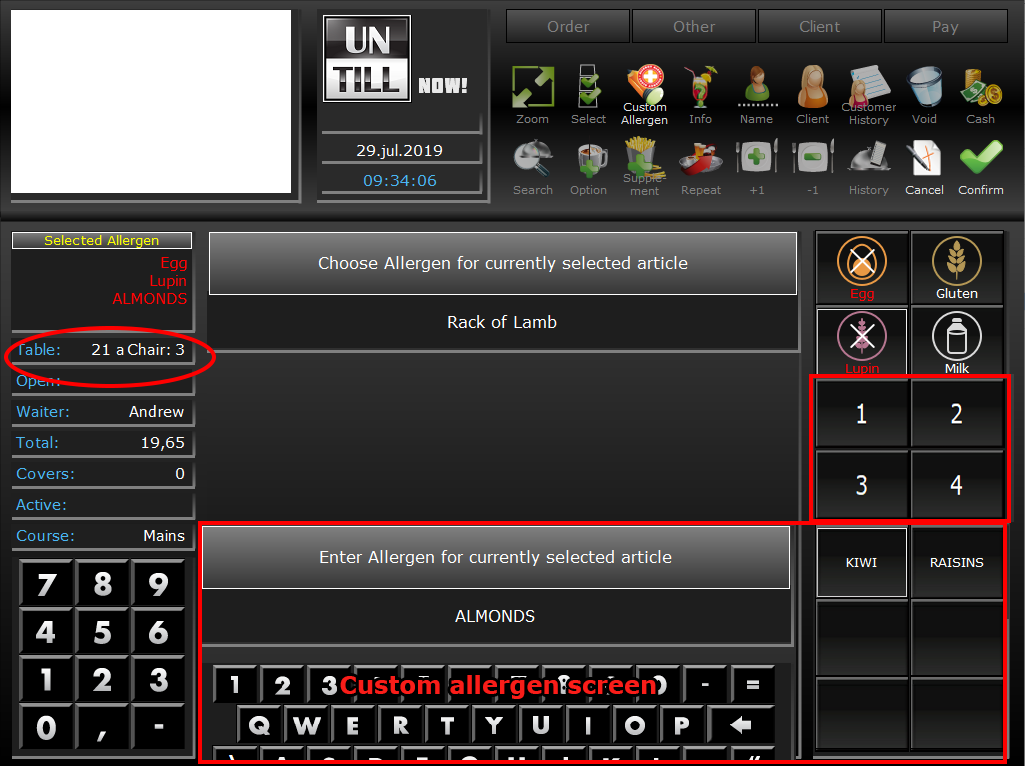
- In the Order Screen select the item in the Order Overview➂and click

- The allergens that are present for the article are highlighted. The allergens that aren’t highlighted can also be selected
- Select the allergen(s)➁you want to add
- The selected allergens are highlighted and crossed out and they show in➃
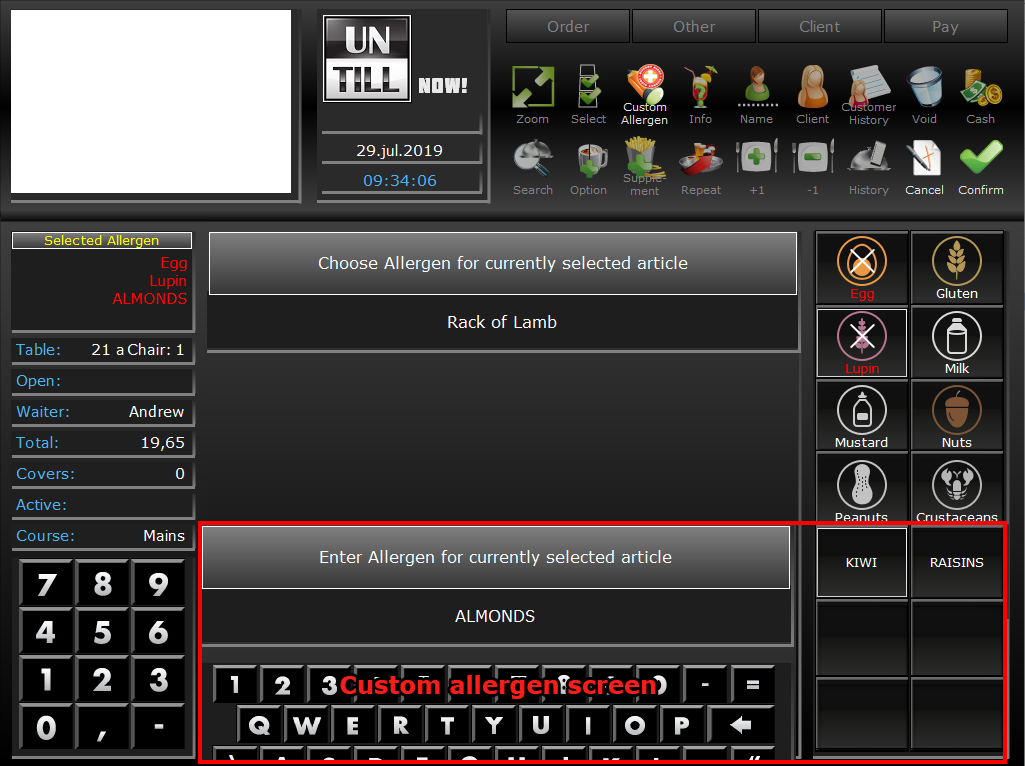
- To add an allergen that is not in the list press

- Use the keyboard to enter the name of the allergen, or choose from the allergens added before➄The custom allergen is automatically added to the list and will be available the next time allergens are added
- Pressto confirm the allergens for the article
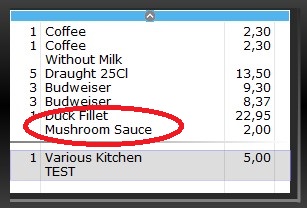
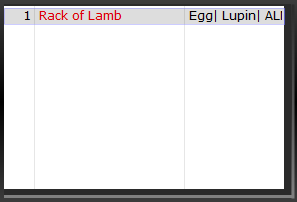
- Your chosen allergen(s) show on the Order Overview➂and the article is displayed in a different colour
- To alter/ remove the allergens before the orders is confirmed pressagain and repeat the steps disabling/ selecting the allergens you want to remove/ add
- Pressto confirm the order
The added allergen is now attached to the selected item and will also show on the designated screen(s) and/or printer(s)
You can’t alter/ remove allergens after the order was finalized. To correct, you have to void the whole item using the![]() button, then re-order the item and repeat the steps to add one or more allergens
button, then re-order the item and repeat the steps to add one or more allergens
Assign Allergens to a Chair
You can assign allergen(s) to a chair number, so that all articles ordered for the chair will automatically have the allergens linked to it on all screens/ prints
- In the Order Screen click other and press

- Select the chair number➀this is displayed in the table overview➁
- Pressand select the allergen(s)➂you want to add
- The selected allergens are highlighted and crossed out and they show in➃
- To add an allergen that is not in the list press
- Use the keyboard to enter the name of the allergen, or choose from the allergens added before➄The custom allergen is automatically added to the list and will be available the next time
- Pressto confirm the allergens assigned to the chair
- Now you can add articles to the chair and chosen allergen(s) show on the Order Overview and the article is displayed in a different colour
- Keep in mind that the allergens only apply to the selected chair, so for other orders and allergens you have to alter the chair number. To add an order for another chair without allergens don’t select any allergens or useand/or
- To alter/ remove the allergens before the orders is confirmed pressagain and repeat the steps disabling/ selecting the allergens you want to remove/ add
- Pressto confirm the order
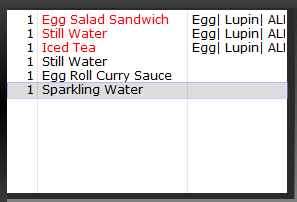
The added allergen is now attached to the chair and is automatically added to all articles ordered for the chair and show on the designated screen(s) and/or printer(s)
Remove Ordered Items
Cancel one or more ordered items
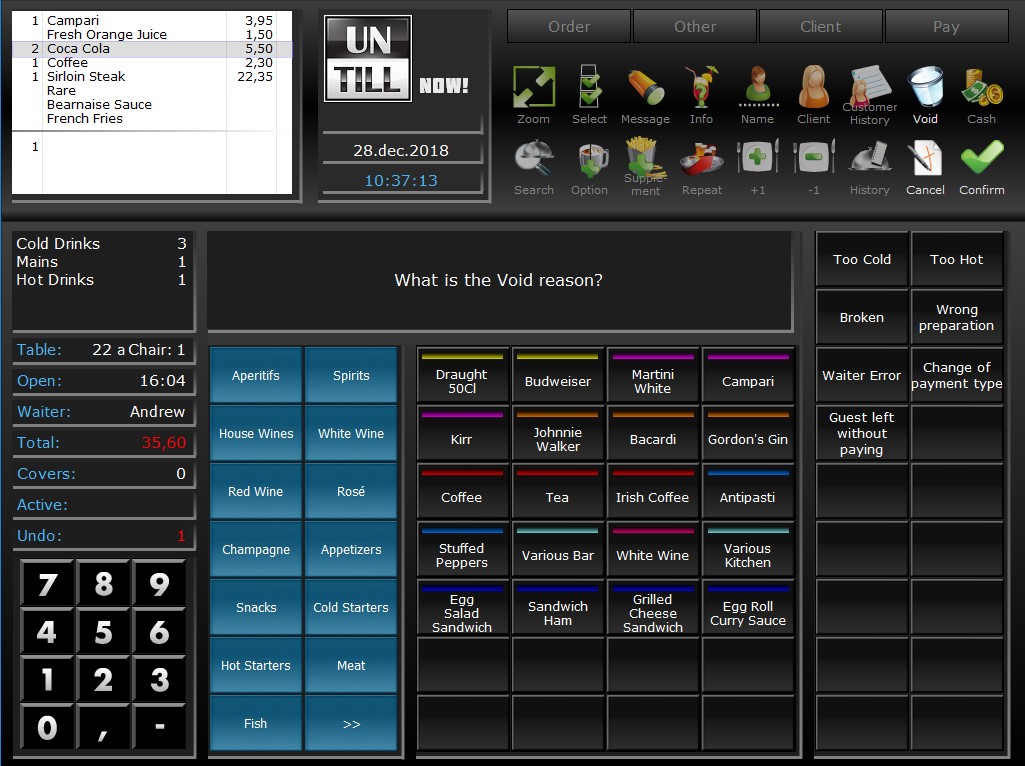
- In the Order Screen select the item in the Order Overview➀
- Click
- On the screen a box appears asking what the void reason is➁
- Select a preset reason➄(your selected reason does not show anywhere on the screen)
- In case of a plural of an item enter the desired number first, using the numeric pad➂
- Press
- In the Order Overview➀the cancelled item is now shown with -1 in front of it (or when a plural item is voided, the specific number is shown e.g. -5)
- Repeat these steps to remove more items
- Pressto finalize voiding the ordered item
- If you want to undo voiding an item BEFORE YOU FINALIZED, select the voided item in the Order Overview➀and pressagain (your order overview now shows the item as a normal order) or pressto undo all your actions, which haven’t been finalized, and immediately return to the Table Screen
Next time you see the Order Overview the voided item is not shown. If you want to undo voiding an item, Order the item again

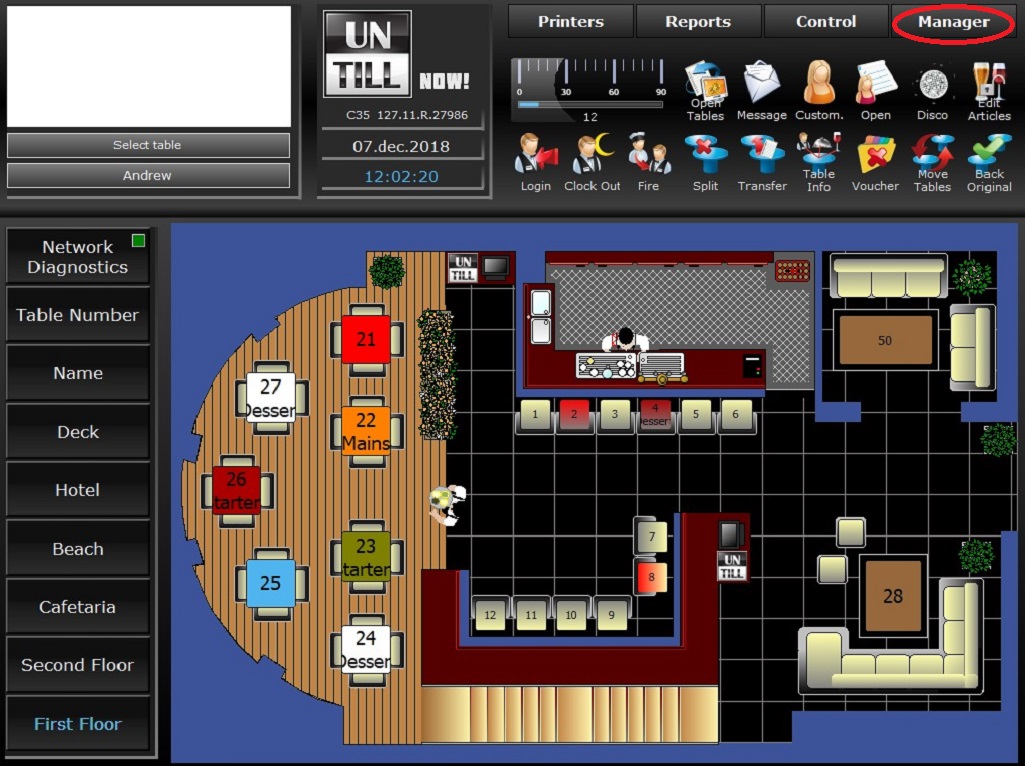
Direct Sales
Switch to direct sales mode
- Press
 in the Table Screen or open the Manager Screen and press
 - The Order Screen opens
- You can select articles➀they show on the Order Overview➃
- Will empty the whole Order Overview
- Will remove the selected item from the Order Overview
- You’ll have to pay every complete order immediately by pressing the
 button or use the Payment Screen
Change Back to the Restaurant Mode
- Click Other➄
- Press

You automatically return to the Table Screen and the Restaurant Mode
1
2
3
4
5
1
Items to order
2
Table information
3
Numeric Pad
4
Order Overview
5
Other
Change Order Type
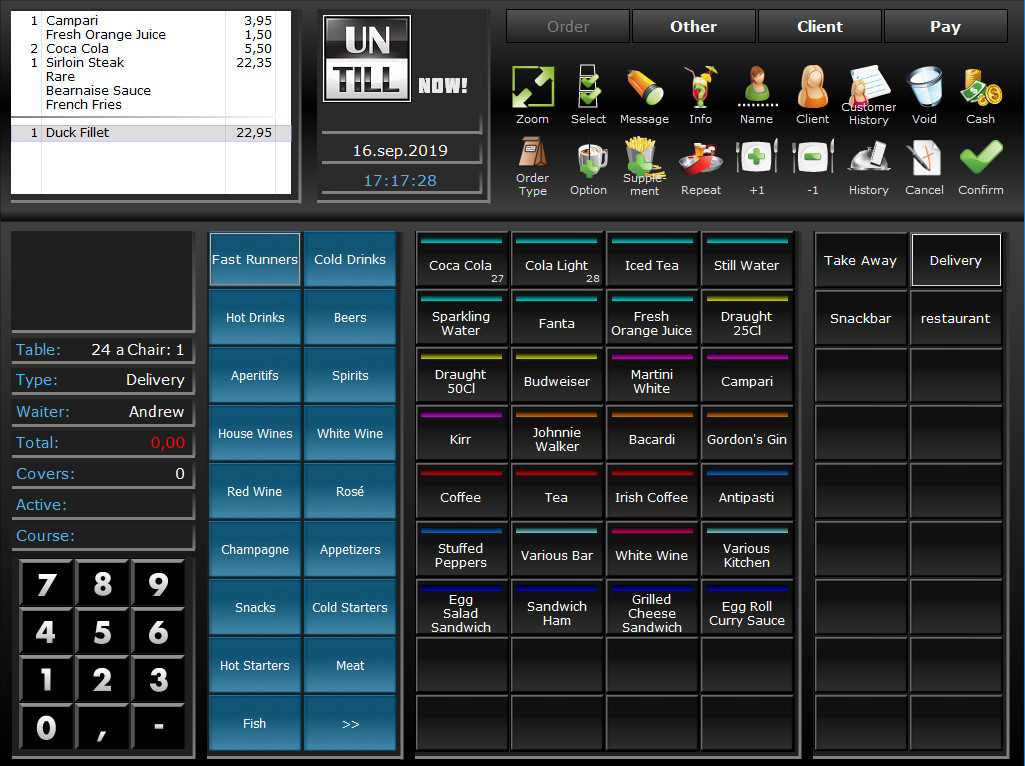
Indicate what type of order it is e.g. delivery, snack bar, restaurant, etc.
- In the Order Screen press the button to set/ change the order type➀
- The available Order Types are displayed➁
- Select the one that applies for the whole order and press(the order screen stays open and the order isn’t placed yet)
- You can now see the Order Type in the table information➂
- When the order is complete confirm it via
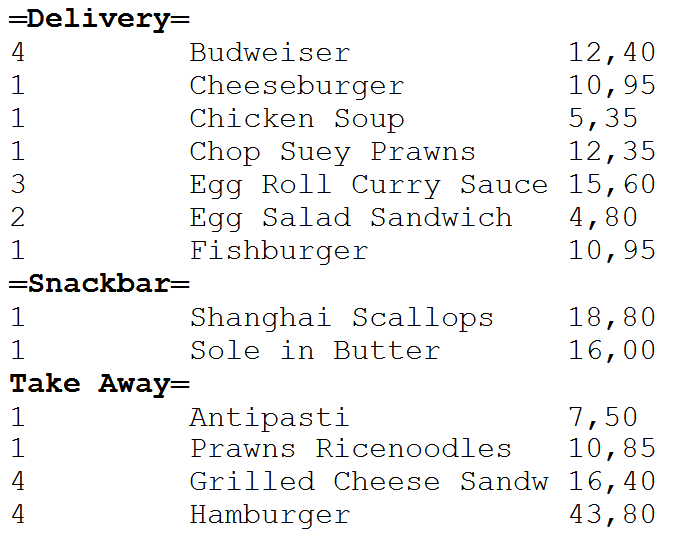
The order type can be altered until the order is paid. The order type is now displayed on bill and in reports➃
1
2
3
1
Order type change example button
2
Order types to select
3
Table information with the order type
1
2
3
4
4
Example report with Order Types
Article Info
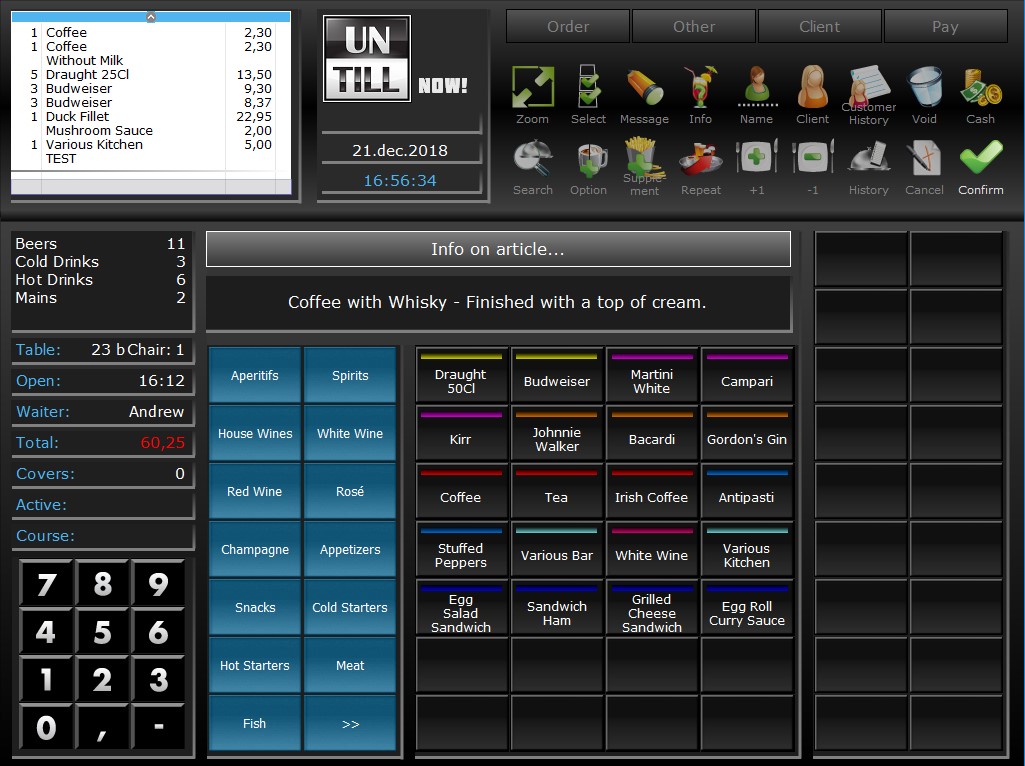
Shows information on an article
- Press
 in the Order Screen
 - Select the article of which you want the information
- The Article Info screen opens, showing you the description of the article➀(if any)
- Pressto return to the Order Screen
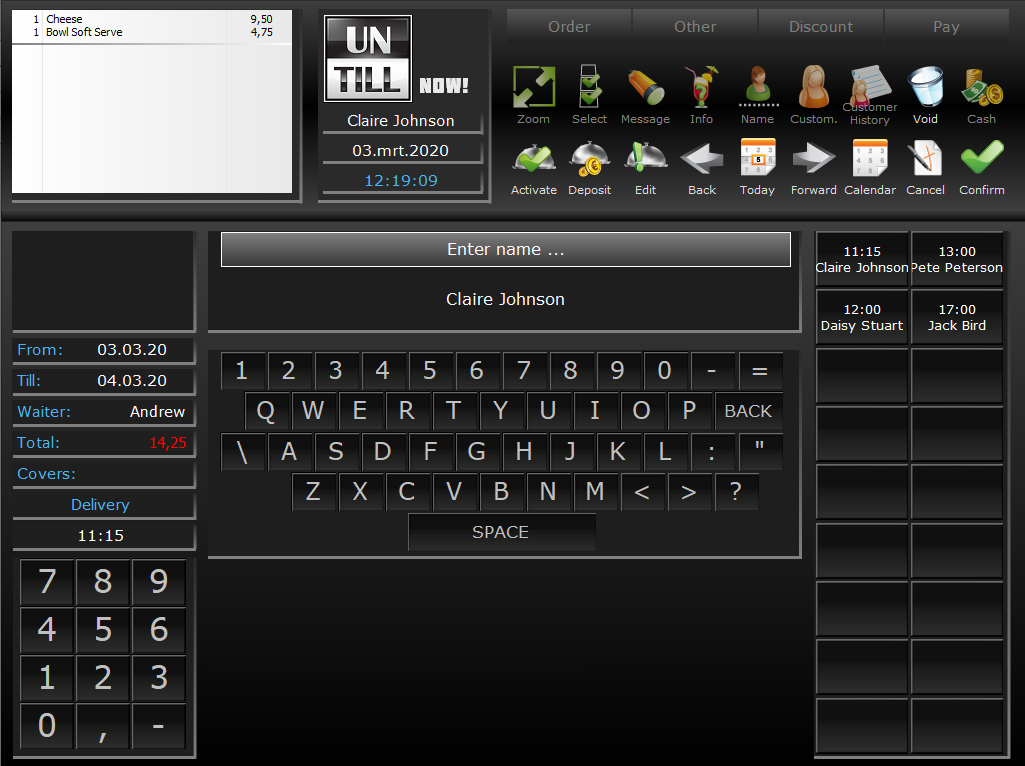
Order in the future
Allows you to place an order, which will be processed in a later time and/or date, without keeping the table occupied
- In the Order Screen click other (you can select any table to open the order screen)
- Press

- Select the date on which the order will be activated➀
- With
 and
and you can change the month
- With
- Choose the time the order will be activated➁
- Pressand select the client for whom the order is in the Client Screen
- You can use the keyboard, numeric pad, and/or barcode/RFID scanner to filter on client’s name, phone number, card number, etc, to make it easier to find the client you need
- Presswhen you selected the correct client, to return to the Order Screen
- Add articles to the order
- Onyou return to the Table Screen
Future orders are booked on a predefined table
Activate an order in the future
To be able to process the order in the future and close it, you need to activate it
- In the Order Screen click other (you can select any table to open the order screen)
- Press
 to open the Future Orders screen
 - Select the order you are going to activate➂
- You can use the keyboard, numeric pad, and/or barcode/RFID scanner to filter on client’s name, phone number, card number, etc, to quickly find the client’s order in future
- The future orders are shown in the list according to the date range➃you can alter the date range
to go forward one day
to go back one day
 to choose a specific day and month
 to show the data for the current day
- The client order you selected is displayed➄
- To alter the articles in the order you can press
 and the Order Screen for the selected order is opened, you can now edit the articles within the order without activating the order
 - Press
 to activate the order, the Order Screen for the selected order is opened, you can optionally alter/add articles
 - Choose a payment for the order to close it
Note that when an activated order in the future isn’t closed/paid, the order remains active. Other orders in the future cannot be activated because the predefined future order table is already active. Only when the active order is closed or removed from the order in future table, can another order in the future be activated
1
2

1
Day of the month
2
Time the order should be active
1
2
3
4
5
3
Future orders for current date & time range
4
Only future orders within this range are shown
5
Client’s name of the selected order