Chef starts preparation: State ‘Pending’
Our kitchen screens offer a great variety of functions and overviews, the following is a description of some of the major differences with the standard use. These features are only available from a specific software version, contact the dealer for your personal options
Normally when the front of house orders/fires a course, the timers for preparation automatically start counting down on the kitchen screen. With ‘pending’ the course(s) appear on the kitchen screen with the label ‘waiting’ and every course has to be started manually before the timers start counting down. Courses that haven’t been started their preparation cannot get the state ‘ready’ and cannot be sent to pickup
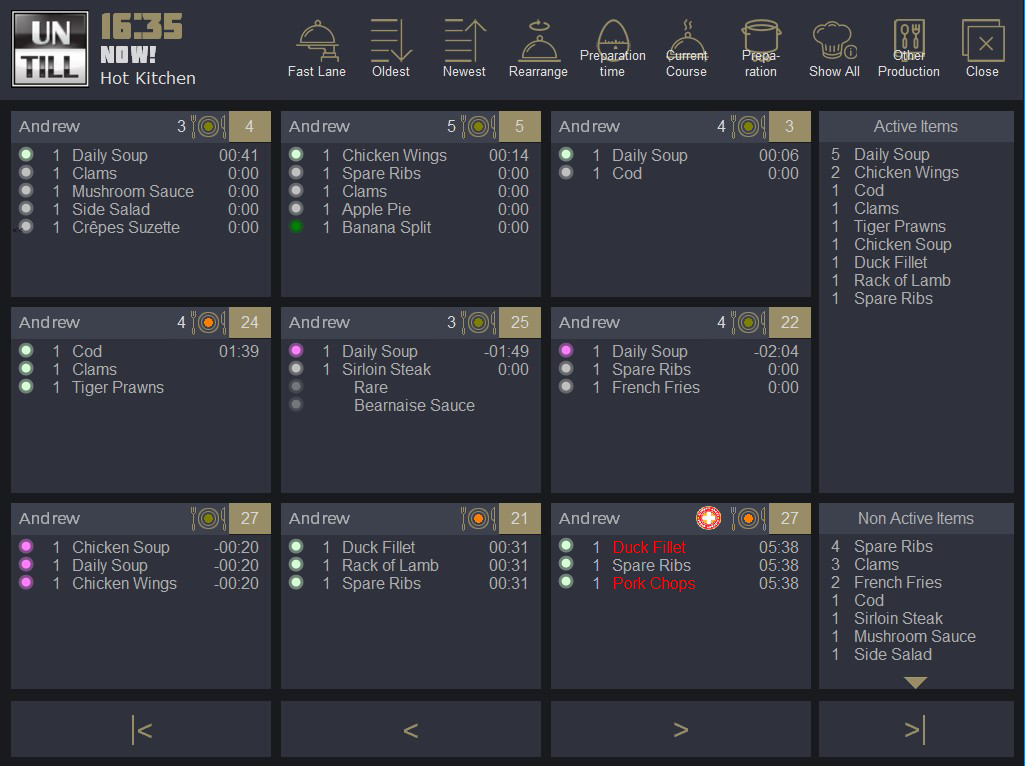
- Ordered articles appear, according to the preparation area, in the assigned kitchen screen➀
- The timers don’t automatically start their countdown and the chef has to start every course manually. You can select a single order, or multiple orders at once
Select single order:
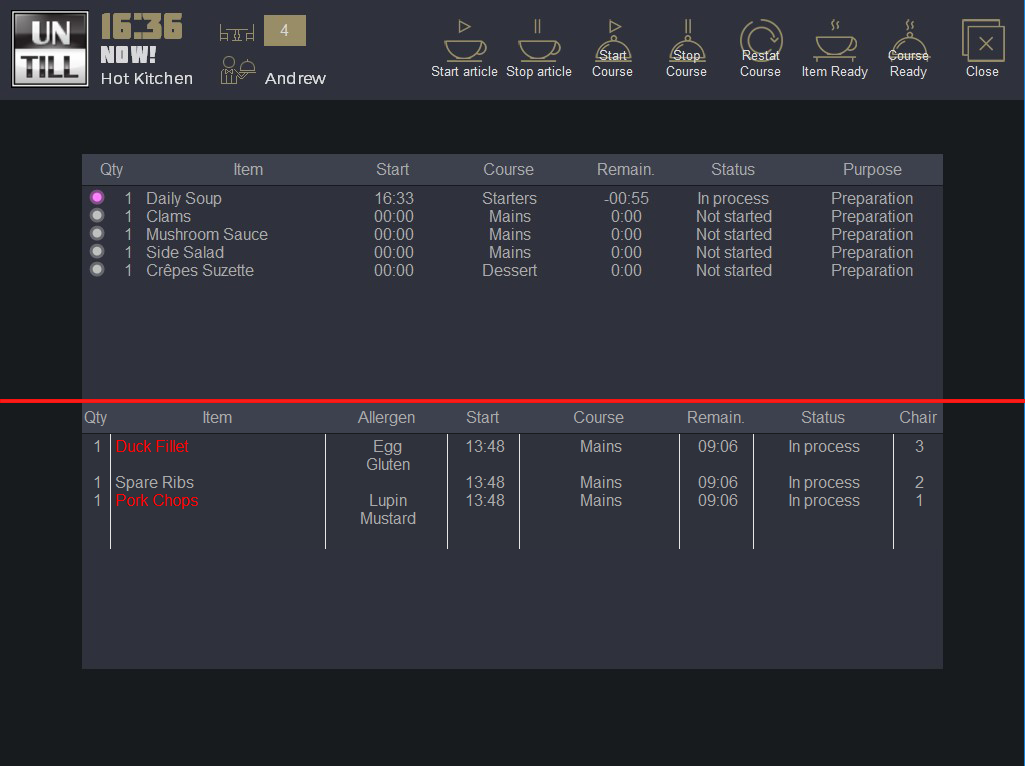
- Press the order and the detail screen opens➁
- The overview here shows all articles in the order, the course that is first in line for preparation has the status ‘Waiting‘ the next courses in the order are ‘Not started‘
- Press
 to start preparing the articles which are first in line, the status ‘Waiting‘ changes into ‘In process‘➂
 - In the kitchen screen➃the bulb changed colour and the timers started their countdown in sequence of duration
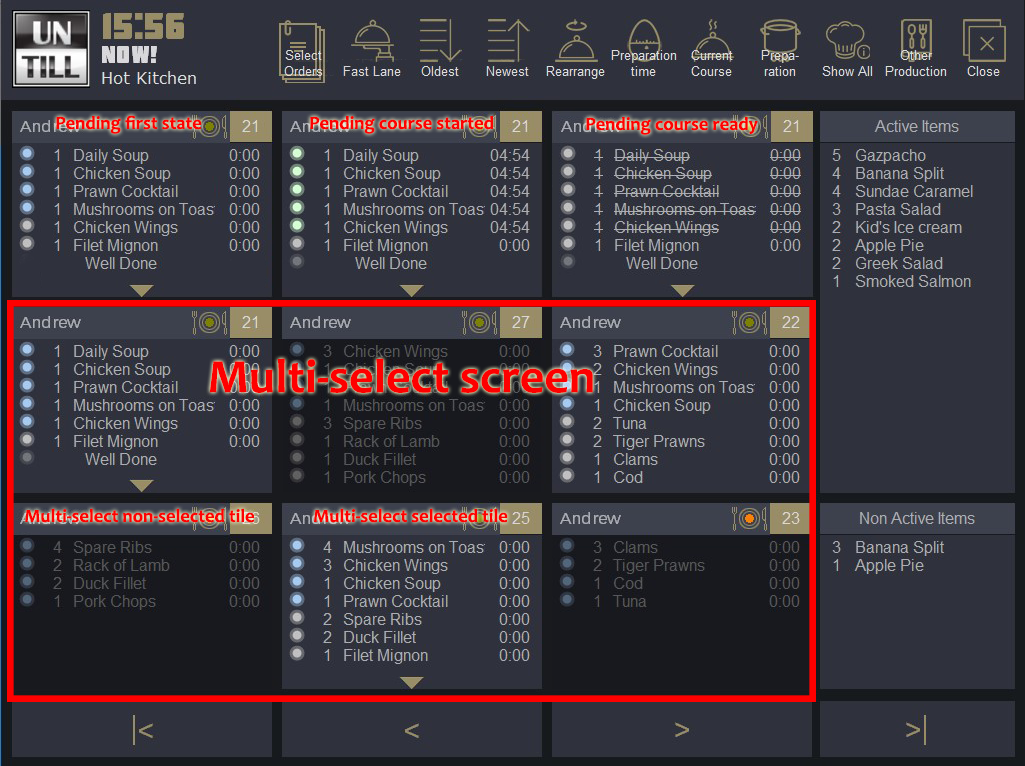
Select multiple orders:
- Press
 and all orders change colour➄
 - Click the orders one by one to select the ones you want. Once an order is selected its colour changes back➅
- Press
 to start preparing all articles in the selected orders with the status ‘Waiting‘➃
When a course is ready:
- Select one or more orders that have courses ready for service and press
 in the detail screen➁or in the multi-select screen➆
 - The finished articles are crossed out in the kitchen and detail screen, they remain shown as such until the orders are Picked Up➇
- Articles get the status ‘Waiting‘ only when the next course is fired
Click here for a detailed overview of the several kitchen screens and buttons
1
2
3
4
5
6
7
8
1
Kitchen Screen
4
Articles in preparation
5
Not selected tile
6
Selected tile
7
Example of what the screen looks like when you have selected multiple tiles
8
Finished articles not Picked Up
1
2
3
4
5
6
7
8
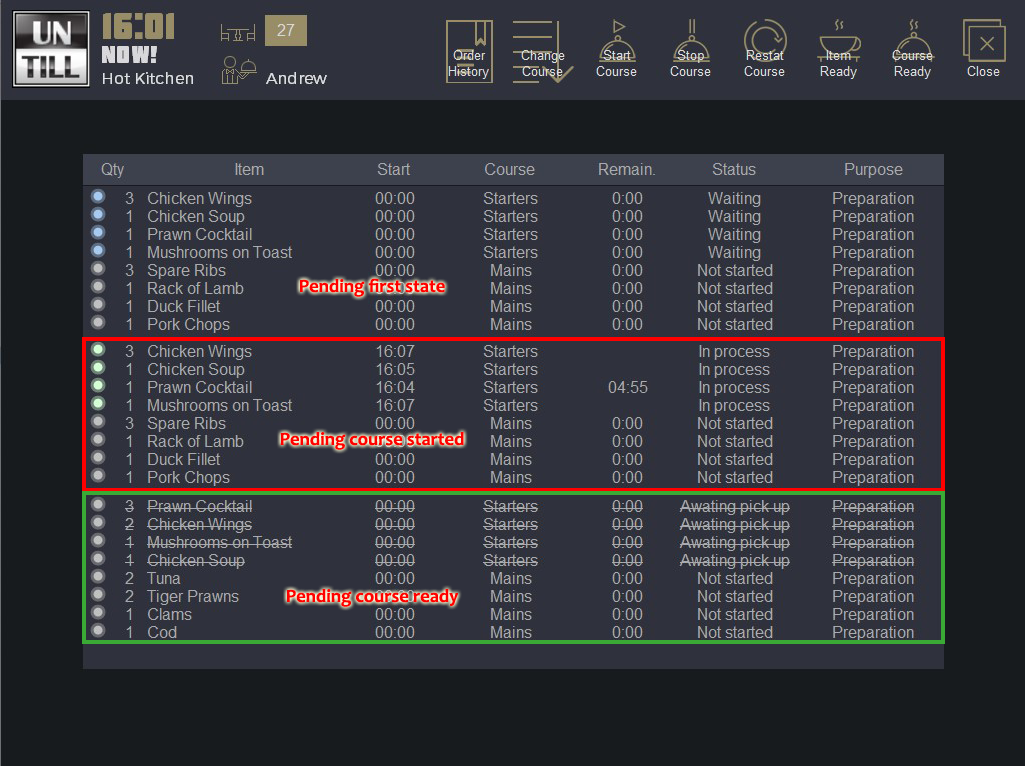
2
Detail screen
3
Course started
8
Finished articles awaiting Pick Up
Switch courses
A course that has the status ‘Not started‘ can be altered in the sequence, so you can have a ‘Main‘ course changed to ‘Dessert‘ for instance
- Click on the order and the Detail Screen opens
- Press
 and a new screen opens➀
 - Select the article➁
- Click the new course➂
- Repeat the steps to alter other articles’ course sequence
The articles that have changed course can be started when they are next in the sequence of courses
1
2
3
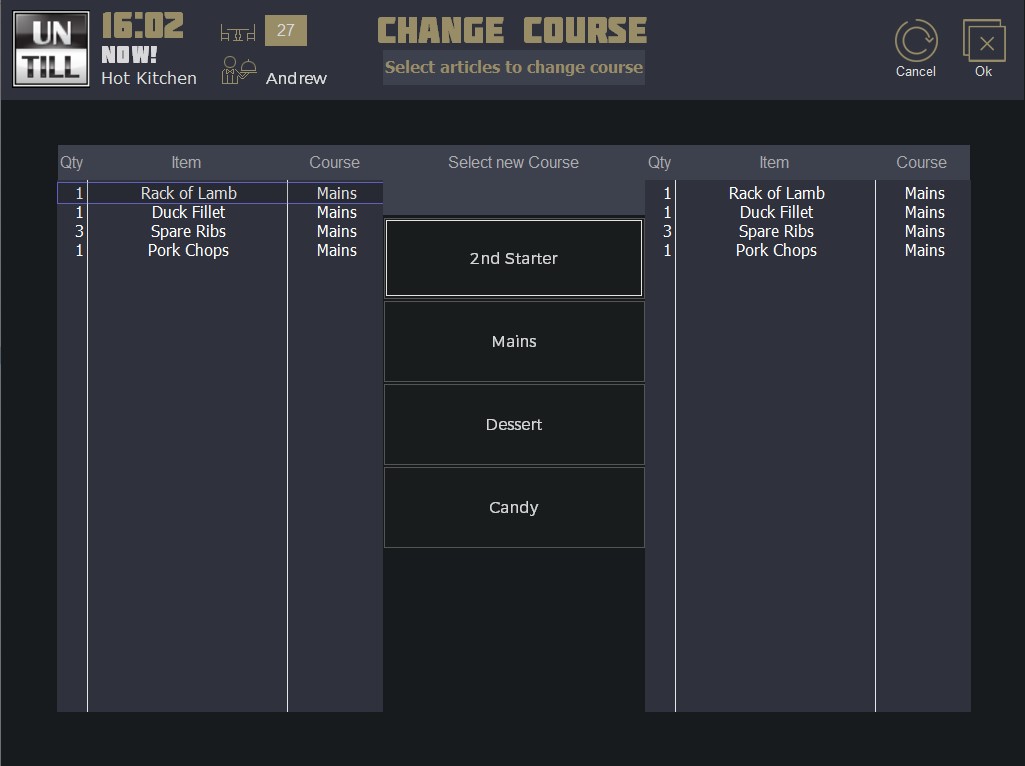
1
Change course screen
2
Articles to select
3
Courses to change to
Basic Use Pick Up Screen
Depending on your settings, articles can be sent to pick up separately or as a complete course
- When, in the kitchen screen, the status of articles is changed to “Ready“
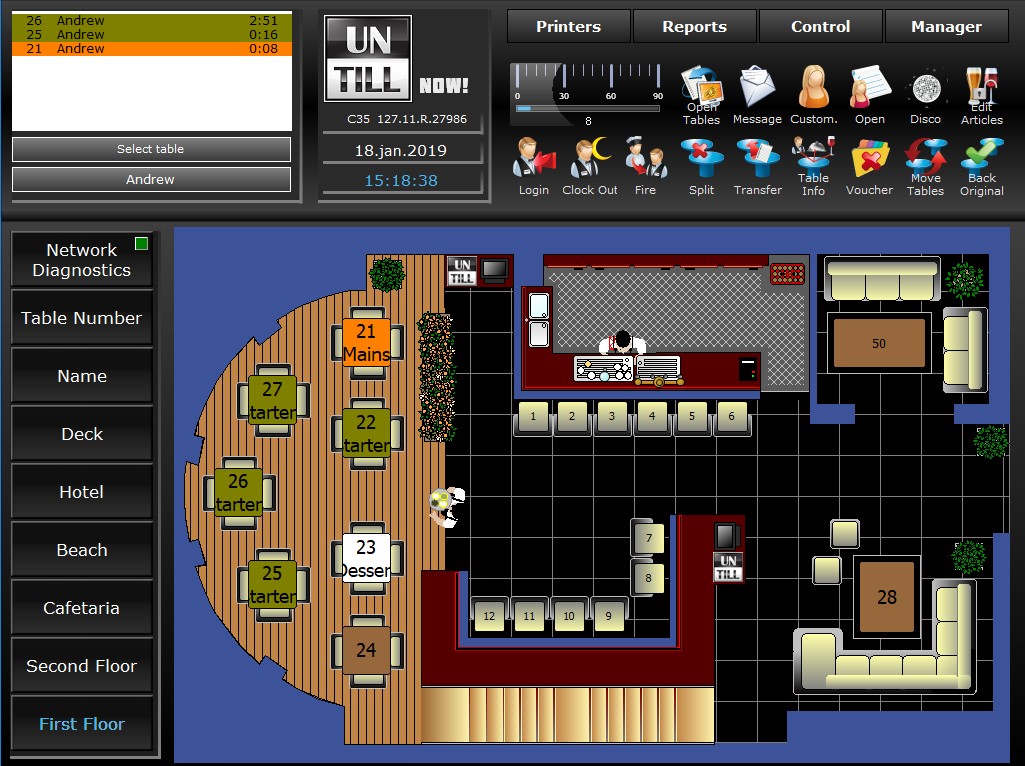
- The info overview➀in the Table Screen shows the tables that are ready for service, the waiter who ordered, and the elapsed time, in the colour assigned to the different courses
- Click on the info overview
- The Pick Up Screen opens
- Press the articles for the table you are going to serve➃
- All the other order overviews fade, the selected order stays lit up
Click the text “Take All” to take out the whole order at once
If you leave articles behind, enter the number of articles➂you are picking up in case of a plural of the same article and select the article button(s)➁then press to confirm that you are taking the selected article, you return to the overview screen and are able to pick up another table. The remaining articles for the table stay in the Pick Up Screen and still show in the info overview➀until the whole order is served to the designated table
Click here for a detailed overview of the pick up screen and buttons
Basic Use Bar Screen
- Articles (usually beverages) appear per table in the Bar Screen
- When an order/article is ready for service, click on the order➀
- The complete order gets the status “ready” and disappears from the screen
Click here for a detailed overview of the buttons used
1
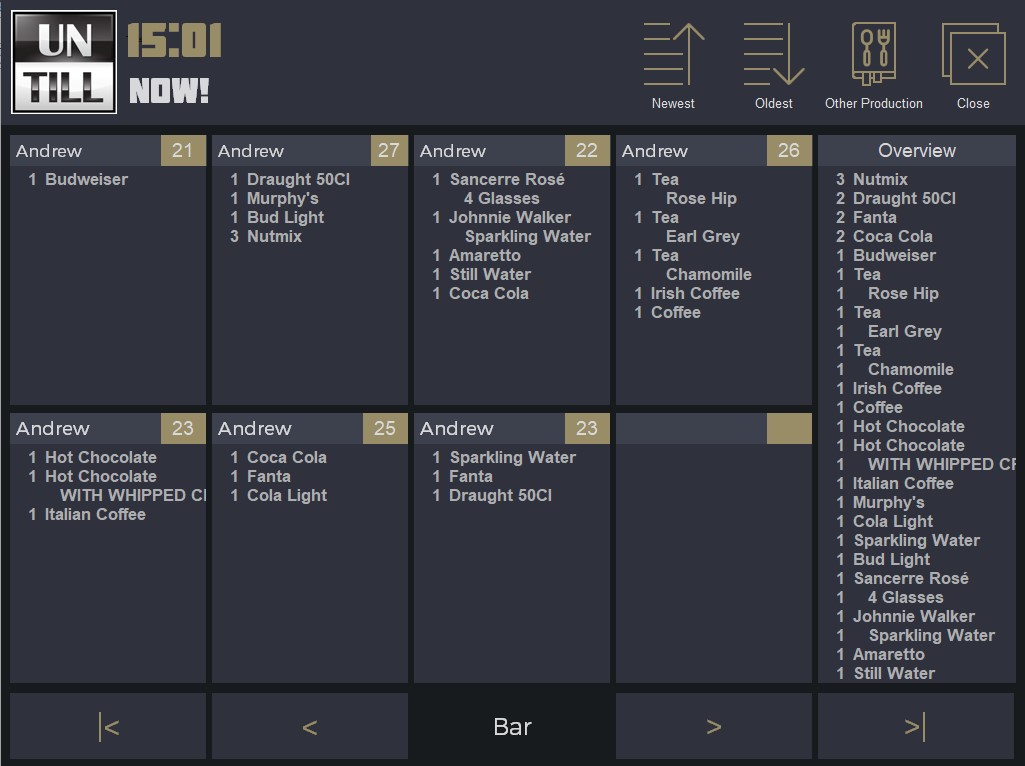
1
Order
Reroute Courses to Different Kitchen Screen
Here you can send courses to another kitchen screen, if for instance you want to have the “Hot Kitchen” prepare the desserts which are normally prepared by the “Cold Kitchen”
- Open the Manager Screen by clicking on the word “Manager” in the Table Screen
- Press
 to open the Kitchen Routing Screen
 - Select the screen name you don’t want the course(s) to show on anymore➀
- Select the screen name you want the course(s) to show on➁
- Select the course(s) you want rerouted➂
- Check the course(s) to be shown on the newly designated screen➃
- Press
 to confirm the rerouting and return to the previous screen
To Cancel rerouting:
- Select a specific reroute➄to just remove one or more course redirects, a screen pops-up➅where you can click on the course reroute you want to undo. The selected one disappears till none are left and you automatically return to the Kitchen Routing Screen
- Or simply press
 to undo all redirects
Click to cancel reroutes before you confirm them and return to the previous screen without making changes
1
2
3
4
5
6
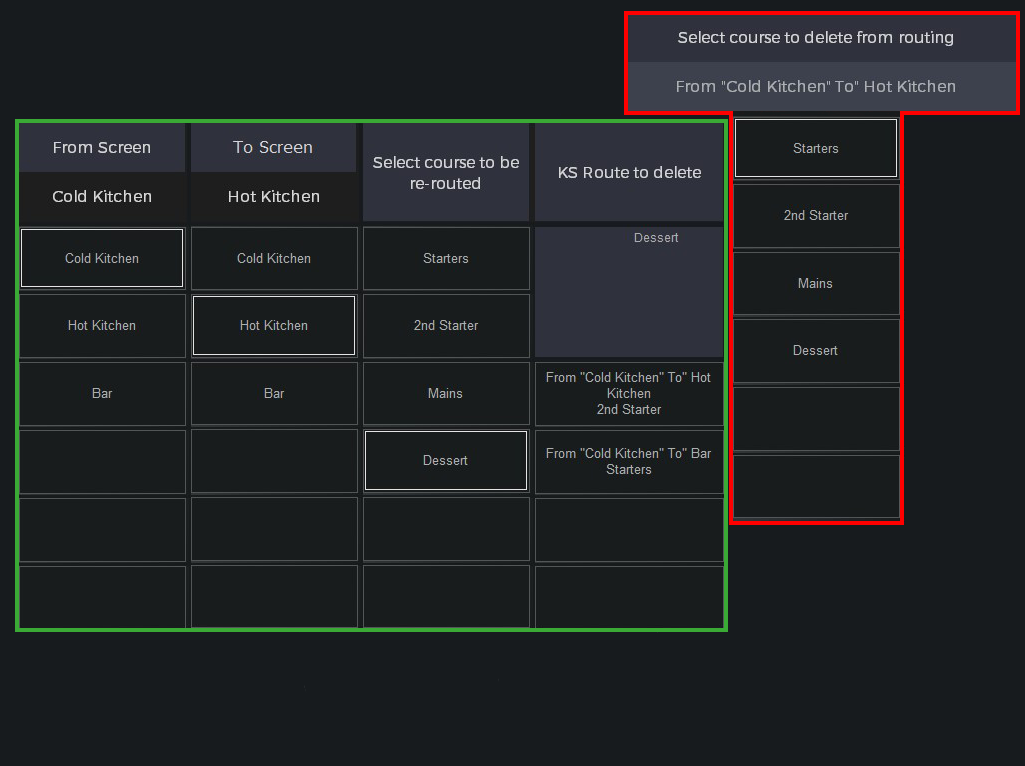
1
The screen from which you want to reroute
2
Screen you want the articles to show for preparation
3
To which courses should the rerouting apply
4
Overview of the courses to which the rerouting applies
5
Select the reroute you want to cancel
6
Select the course(s) to be removed from the rerouting
More Detailed Information Kitchen Screen
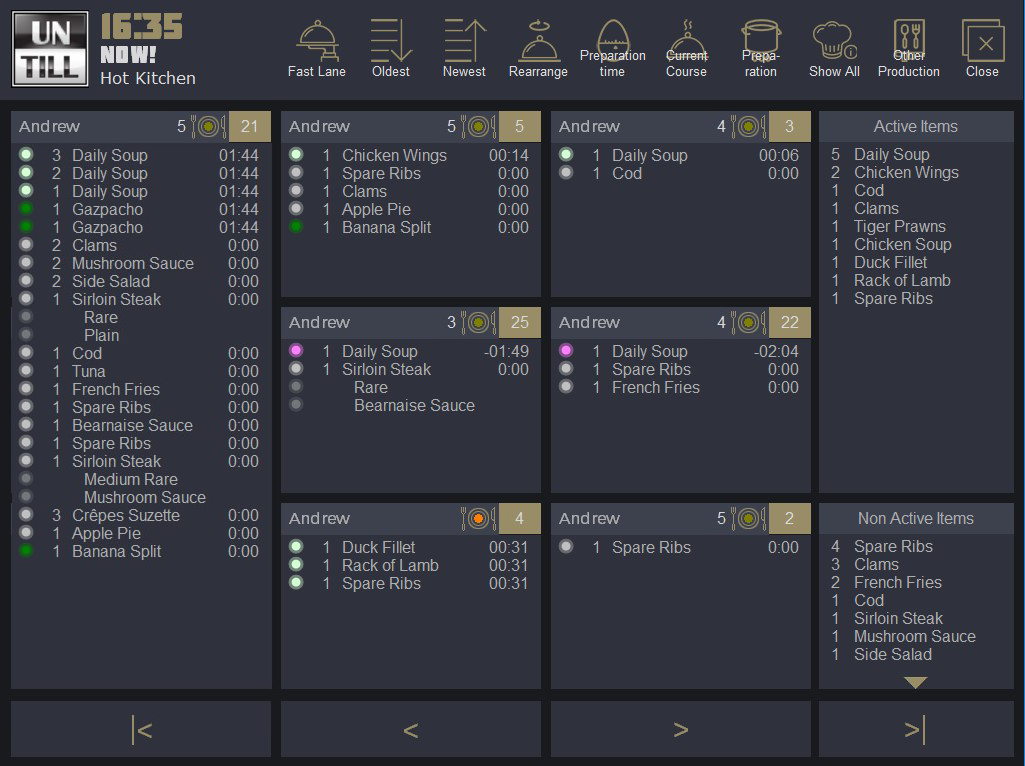
Because the functions and actions in the kitchen screens are the same and their differences are solely in their design, the examples given are clarified with pictures and icons of the new design.
The Kitchen Screen described here shows:
➀The order information bar shows, from left to right:
Waiter who made the last order for the table
Number of covers
What course it is in its corresponding colour
Table number
➁The order overview for the table shows:
A bulb showing in a colour assigned to the status of the article
Quantity of the article
Which article is ordered
A timer that starts counting down the preset preparation time for the article, when time’s up, a minus is added and it starts counting the time it costs extra to prepare the article
➂If an order is too extended for the standard overview field:
Click the order information bar➀and the field is lengthened, so more of the order is shown
➃This shows a list of all articles that have the status “preparation”
➄This shows a list of all ordered articles that await a status change to “preparation”
How to use the Kitchen Screen click here, for a description of the buttons click here
1
2
3
4
5
1
Order information bar
2
Normal overview of order
3
Extended order overview
4
Articles that are being prepared
5
Ordered articles awaiting start preparation
The example screen shown here is labeled “Hot Kitchen,” however the lay-out and functions in the other kitchen screens are the same. Therefore the description applies to all kitchen screens including the bar screen
More Detailed Information Detail Screen
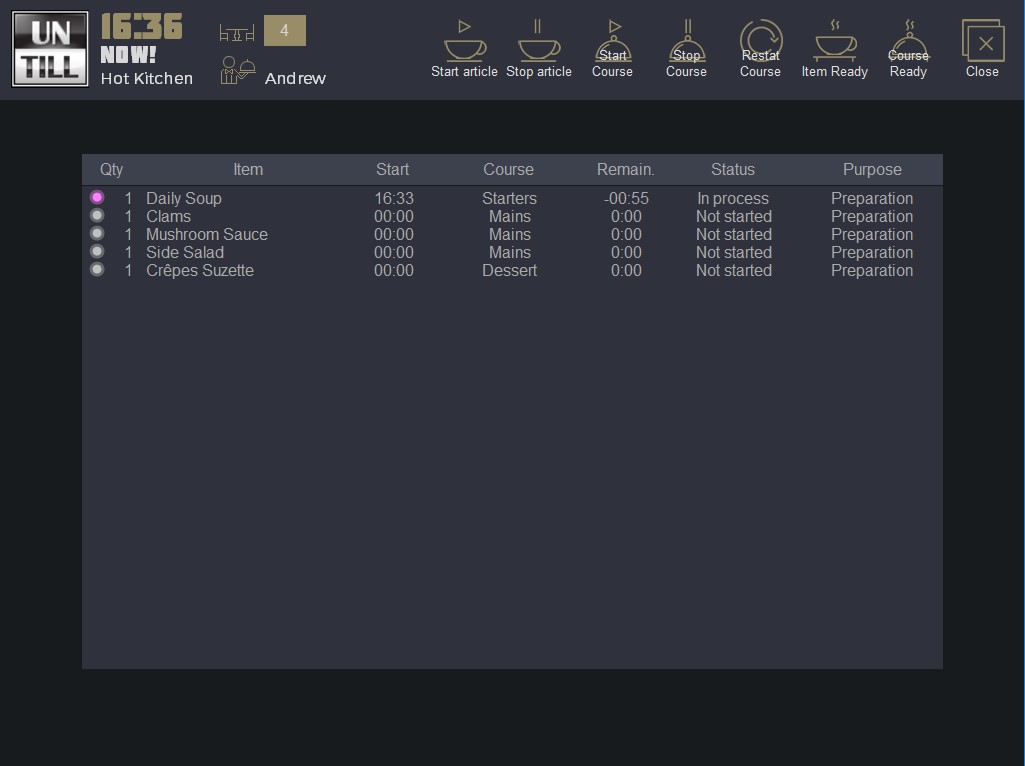
Because the functions and actions in the detail screen are the same and the differences are solely in the design, the examples given are clarified with pictures and icons of the new design.
The Detail Screen described here shows:
➀The order overview shows, from left to right:
A bulb showing in a colour assigned to the status of the article
Quantity of the article
Which article is ordered
The time the article’s course wast started in the kitchen screen
The name of the course
Time left for preparation
Article’s status
The article’s purpose in the screen
You automatically return to the Kitchen Screen after a preset time, for a description of the buttons click here
1
1
Order overview
More Detailed Information Pick Up Screen
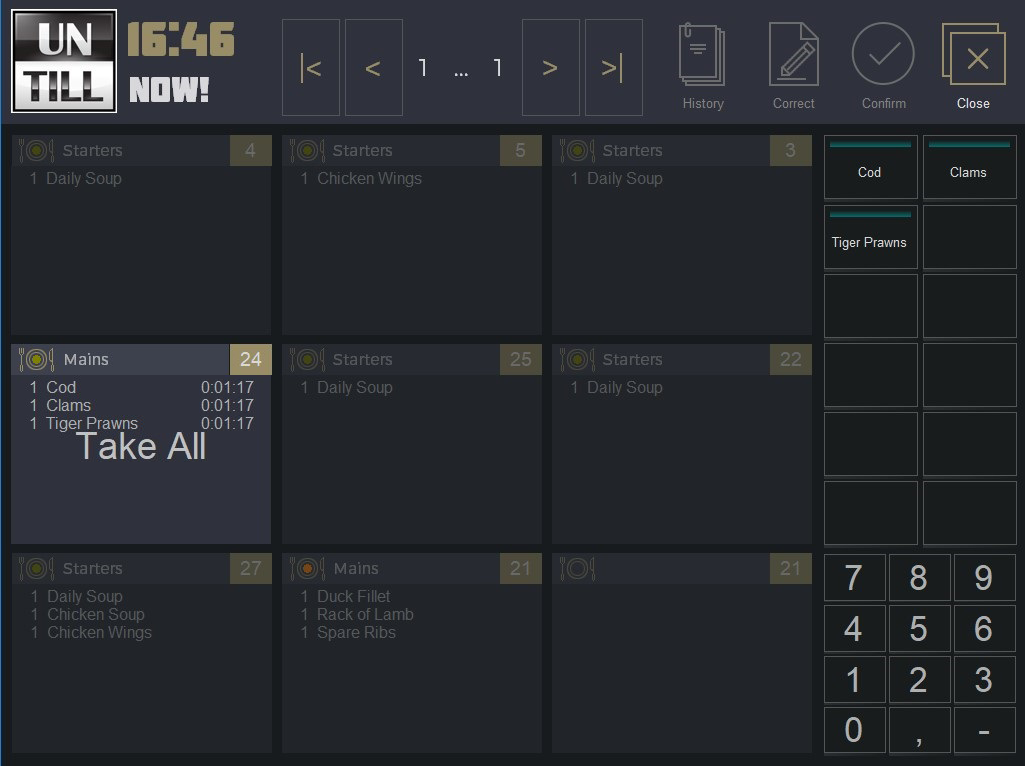
Because the functions and actions of the Pick Up screen are the same and the differences are solely in the design, the examples given are clarified with pictures and icons of the new design.
The Pick Up Screen described here shows:
➀The order information bar shows, from left to right:
What course it is in its corresponding colour
Course name
Table number
➁The order overview for the table shows:
Quantity of the article
Which article is ready
➂When an order is selected to be picked up it additionally shows:
The time it is awaiting Pick Up
The text “Take All”
➃Here you can choose separate articles from the selected order
How to use the Pick Up Screen click here, for a description of the buttons click here
1
2
3
4
1
Order information bar
2
Normal overview of order
3
Selected table to be picked up
4
Separate articles to be picked up

